Introduction
We often use delay in Arduino or time.sleep in MicroPython to pause the execution of a program. However, when these functions are called, nothing else can be done during the pause. This is actually a big waste of computation time. An alternative way to perform a task periodically is to count the time manually, and execute the right codes at the right moments. In Arduino, you can find this ‘blink without delay’ example:
void loop() {
  unsigned long currentMillis = millis();

  if (currentMillis - previousMillis >= interval) {
    previousMillis = currentMillis;

    if (ledState == LOW) {
      ledState = HIGH;
    } else {
      ledState = LOW;
    }

    digitalWrite(ledPin, ledState);
  }
}
This example demonstrates the basic idea of counting the time manually. In MicroPython, we may use the same way to achieve some sort of multitasking. However, this approach can be very tedious, especially if we have more than two tasks running together. Fortunately, MicroPython has a module called uasyncio that can help us schedule and run these tasks without writing lots of codes.
In this tutorial, we will learn:
- how to use
uasyncioto schedule and run multiple tasks asynchonously.
As a demonstration, we will blink an LED, and at the same time use the potentiometer to control its brightness.

Materials and Tools
- ESP32 x 1
- LED x 1
- 10 ohm resistor x 1
- Potentiometer x 1
- Jumper wires
Prerequisites
We assume that you have installed the Thonny IDE to your computer, and flashed the MicroPython firmware to the ESP32. If you have not done that, you should follow this tutorial to do so.
Also, we assume that you have the basic concepts of analog input and output in microcontrollers. If not, you may check out this tutorial about analog IO in Arduino.
Connect the Hardware
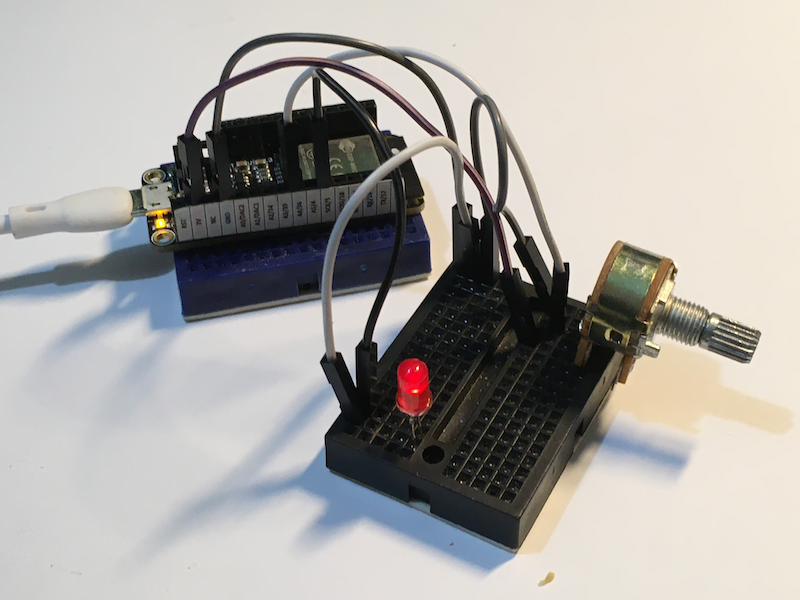
The connection is straightforward:
| LED/Potentiometer | ESP32 |
|---|---|
| LED +ve | Pin 5 |
| LED -ve | GND |
| Potentiometer +ve | 3.3 V |
| Poteniometer output | Pin 36 |
| Potentiometer -ve | GND |
You should add the 10 ohm resistor in the circuit of the LED to prevent the LED from being damaged.
Install uasyncio
First, we will need to install the uasyncio library. Fortunately, it can be installed easily with the upip module if the ESP32 is connected to the Internet. We are going to use the REPL shell in the Thonny IDE to install the library.

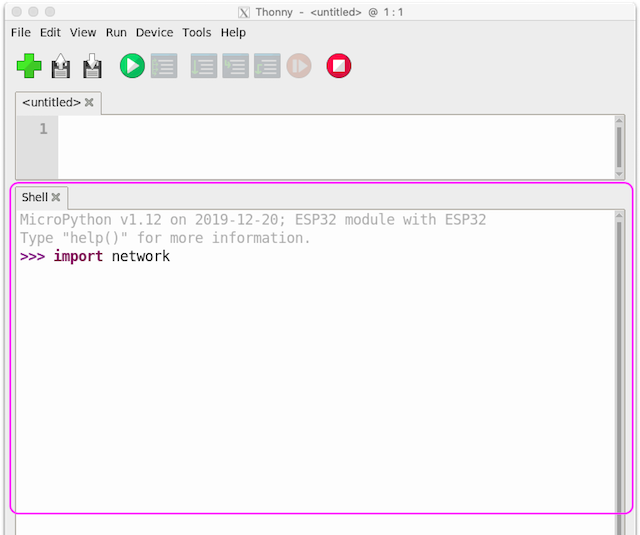
First, we need to connect the ESP32 to the Internet. In the REPL shell, enter the following commands line by line.
import network
sta_if = network.WLAN(network.STA_IF)
sta_if.active(True)
sta_if.connect("YOUR_WIFI_SSID", "YOUR_WIFI_PASSWORD")
sta_if.isconnected()
Replace YOUR_WIFI_SSID and YOUR_WIFI_PASSWORD with your Wifi station’s SSID and password. After connecting the ESP32 to the Internet, we can use upip to install uasyncio. Enter the following commands to the REPL line by line.
import upip
upip.install('micropython-uasyncio')
Get the LED and the Potentiometer Ready
Open a new Python file to write the code. First, we import the libraries that we need.
from machine import Pin, PWM, ADC
import uasyncio
Then, we create an object of class PWM for controlling the LED and an object of class ADC for reading the value of the potentiometer.
led = PWM(Pin(5), 5000)
pot = ADC(Pin(36))
pot.atten(ADC.ATTN_11DB)
We use Pin 5 to produce PWM signal at 5000 Hz for the LED, and Pin 36 to read the value of the potentiometer. The line pot.atten(ADC.ATTN_11DB) tells the ADC that the range of voltage is from 0V to 3.3V.
NOTE: The ADC of ESP32 can use different full ranges of voltage, including 1.2V, 1.5V, 2.0V and 3.3V.
Then, we read the value from the ADC. The value from the ADC is scaled and stored to a variable called brightness.
brightness = int(round(pot.read() / 4))
NOTE: The value from the ADC is a 12-bit number (from 0 to 4095) while the duty cycle of a
PWMclass object is a 10-bit number (from 0 to 1023).
Define the Coroutines
Coroutines in Python can be thought as functions that can yield the computation time when it is paused. When we call the sleep function from the time module, the entire program is paused, and nothing else can be done. The uasyncio module solves this problem by making these coroutines cooperate with each other. Each coroutine can run as long as it needs, and when its work is completed, it yields the computation time to another coroutines. In this way, the ESP32 can achieve multitasking. This kind of multitasking is called cooperative multitasking.
In Python, defining a coroutine is very similar to defining a function. Let say we want to define a coroutine to blink the LED at an interval of 1 second:
async def blink():
    global brightness
    while True:
        led.duty(brightness)
        await uasyncio.sleep(1)
        led.duty(0)
        await uasyncio.sleep(1)
As we can see, there are only two difference between a function and a coroutine. First, the keyword async is added before def. Second, at the point where the computation time can be yield (in our case, when the sleep function of the uasyncio module is called), this keyword await is added. Note that the sleep function or the sleep_ms function of the uasyncio module are used to make the cooperative multitasking work. If you use the thread-blocking sleep function from the time module, the computation time will not be yielded.
NOTE: Don’t forget to use the
globalkeyword to indicate that you want to use the global variablebrightnessdefined outside this function/coroutine.
Similarly, we define a coroutine for the potentiometer.
async def update_brightness():
    global brightness
    while True:
        brightness = pot.read() / 4095 * 1023
        await uasyncio.sleep_ms(100)
Since we update the value of brightness a lot more frequently, we use the sleep_ms function for more precise timing.
That’s it! Each of these two coroutines will run indefinitely, and yield the computation time whenever its work is done.
Schedule and Run the Tasks
After defining the coroutines, we need to (1) schedule the tasks, and (2) start running the tasks. The event loop of uasyncio is responsible for both. We add the coroutines to the event loop object, and then tell the event loop to start the execution.
First, we get the event loop object from the uasyncio module.
event_loop = uasyncio.get_event_loop()
Next, we add the coroutines to the event loop.
event_loop.create_task(blink())
event_loop.create_task(update_brightness())
NOTE: When putting a coroutine to the function
create_taskas a parameter, don’t forget to put the parentheses after the coroutine’s name. We need to write it as if we are calling a function.
Finally, we start the event loop.
event_loop.run_forever()
The event loop will run over and over again . Alternatively, you may call run_until_complete if you want to run the tasks until they complete.
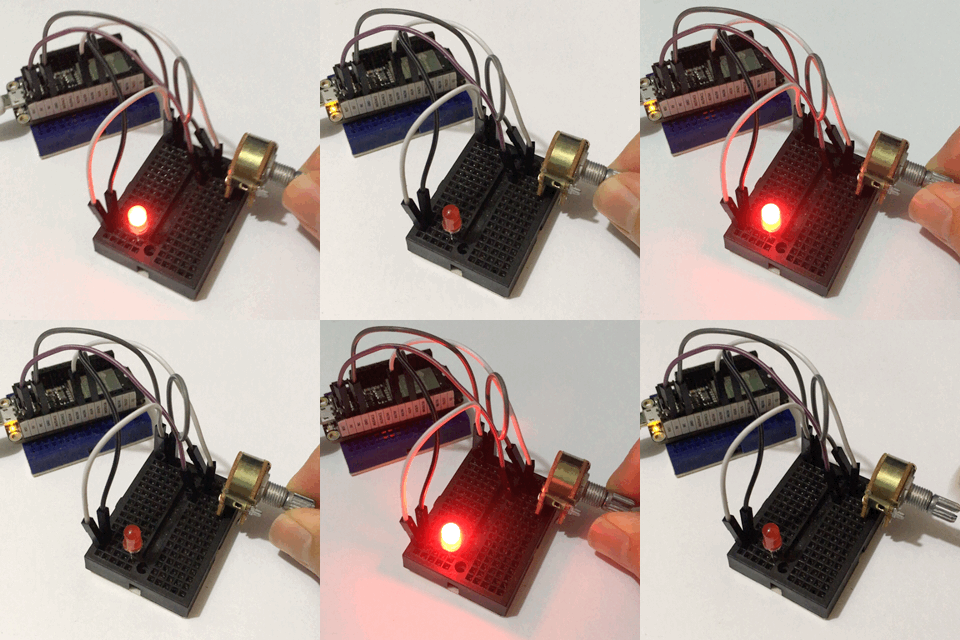
Press Ctrl + F2 to restart the MicroPython REPL, then press F5 to run the script in Thonny. You can adjust the brightness of the blinking LED now!

NOTE: If you find that your codes cannot run properly after restarting the REPL via ‘Ctrl + F2’, you may need to press the reboot button on the ESP32 to perform a hard reboot first.
You may find the sample code here, and ask us on our Facebook page if you have any problems.
Conclusion and Assignment
With uasyncio, it’s very easy to schedule and run multiple repeated tasks. Since the ESP32 has so many GPIOs, it’s quite possible that we connect multiple sensors and actuators to the microcontroller. While it’s perfectly fine to use multiple sensors and actuators without cooperative multitasking, using uasyncio to schedule and run these tasks make the program a lot more readable and easy to debug.
One particular library that utilizes the uasyncio module is the picoweb web server. It allows us to create an asynchronous web server that resembles the Flask web server in CPython. In fact, even on the less powerful ESP8266, the web server can be run along with 5 to 6 sensors!
To consolidate your knowledge, try the following assignment:
Modify the program in this tutorial so that the sensor values are read every second, and a message is sent to Telegram every minute.
The original program can be found here. Once you have completed, take a look of the sample code here. Ask us on our Facebook page if you have any problems.