Introduction
When smart devices are connected to the Internet, they can exchange data with each other and do their jobs with those extra data. Therefore, an IoT system with centralized data facilities is a common design. Such centralized data facilities are often cloud services like Microsoft Azure, Google Cloud and Amazon Web Services. Although these services are very powerful, they are often far too complicated for novices to use.
Luckily, Adafruit has a very novice-friendly cloud service called Adafruit IO. Adafruit IO has a very simple RESTful APIs, which means users can use the service via sending HTTP requests to the server. (If you want to know more about how HTTP works, you may take a look of this tutorial.) More importantly, you can sign up and start using it for free. The free quota is generally enough for most people who want to get started with making IoT projects.
Previously, we have explored how to read temperature sensor data with ESP32 and MicroPython. This time, we will send those data periodically to Adafruit IO. Specifically, we will learn:
- how to send HTTP requests in MicroPython,
- how to use Adafruit’s REST APIs to record data.

Materials and Tools
- ESP32 x 1
- DHT11 sensor x 1
- Jumper wires
Prerequisites
We assume that you have installed the Thonny IDE to your computer, and flashed the MicroPython firmware to the ESP32. If you have not done that, you should follow this tutorial to do so. Also, we assume that you know how to use the DHT11 sensor with MicroPython already. If not, you should go through this tutorial first.
Adafruit IO
Before working on the project, you need an Adafruit account first. Visit the registration page and follow the instructions to create a free account.

A free account can have 30 data points per minute, 30 days of data storage, triggers every 15 minutes, 10 feeds and 5 dashboards. This should be enough for those who try getting started with IoTs.
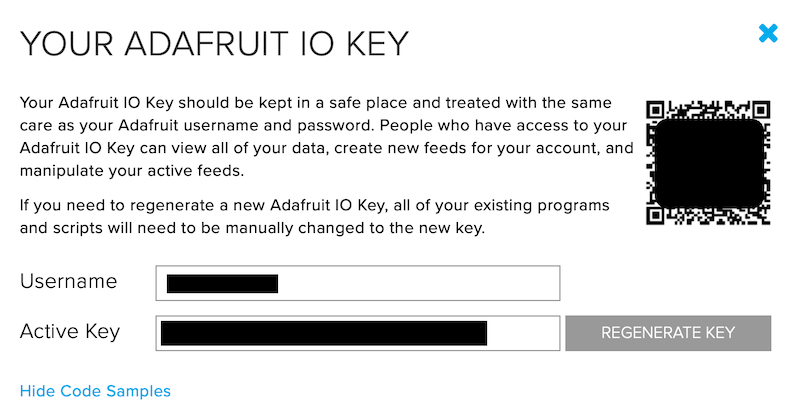
Once you have registered and logged in to your account, go to Adafruit IO page https://io.adafruit.com. You should be able to see “Adafruit IO Key”. Click on it, and you can see your username and active key. Note both of them down on your computer.
After that, close the Adafruit IO Key modal. Click Feeds → view all to enter the “Feeds” page.
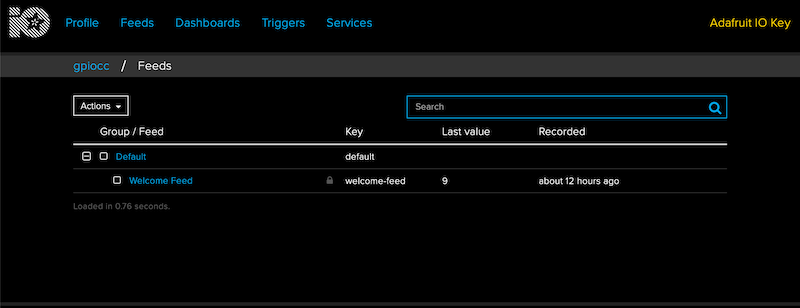
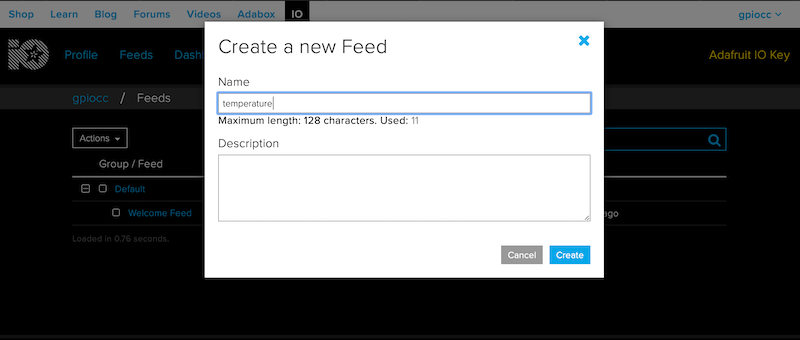
Feed is the core part of Adafruit IO, and we primarily use it to handle data. A feed can hold both data and meta-data such as the time at which a datum is taken. Let’s create a feed for our project. Click Actions → Create a New Feed. Name this feed as “temperature”.
Later on, we will send the data from the temperature sensor to this feed.
Send the Data
Connect the DHT11 sensor to ESP32 as shown in the table.
| DHT11 sensor | ESP32 |
|---|---|
| VCC | 3.3V |
| GND | GND |
| DATA | Pin 15 |
Then, we write the Python program. First, we import the libraries and the functions that we need to use.
import network
import urequests as requests
from machine import Pin
from dht import DHT11
from time import sleep
Next, we define a few constants that we will use to send data to Adafruit IO.
wifi_ssid = "YOUR_WIFI_SSID"
wifi_password = "YOUR_WIFI_PASSWORD"
aio_key = "YOUR_ADAFRUIT_IO_KEY"
username = "YOUR_ADAFRUIT_USERNAME"
feed_name = "temperature"
You should replace the strings of the variables wifi_ssid, wifi_password, aio_key and username with your own Wifi SSID, Wifi password, Adafruit IO Key and username.
Then, we connect the ESP32 to the Wifi station.
sta_if = network.WLAN(network.STA_IF)
sta_if.active(True)
sta_if.connect(wifi_ssid, wifi_password)
while not sta_if.isconnected():
    print(".", end = "")
This creates an object representing the Wifi hardware on ESP32. We set the Wifi hardware to active, and connect to a Wifi station based on the SSID and the password provided in the variables wifi_ssid and wifi_password.
After that, we create an DHT11 object as before.
dht11 = DHT11(Pin(15))
Then, we construct the loop that’s going to run repeatedly. Specifically, we will do the following things:
- Read the temperature from the DHT11 sensor.
- Create and send an HTTP request to Adafruit IO to update the feed with the temperature measured by the DHT11 sensor.
- Wait 60 seconds and start the loop again.
The loop is created with the while keyword:
while True:
The first thing to do in the loop is to read the temperature from the DHT11 sensor.
    dht11.measure()
    temperature = dht11.temperature()
The second thing is to create and send an HTTP request. There are 3 things that should be included in the HTTP request: the URL, the body and the header. Just like browsing the web, we need a URL to send an HTTP request. The URLs for different functions of Adafruit IO can be found in this documentation from Adafruit. For our purpose, the URL can be constructed like this:
url = 'https://io.adafruit.com/api/v2/' + username + '/feeds/' + feed_name + '/data'
The body is an HTTP request is the main data payload. For our project, we need to put the temperature value read from the DHT11 sensor to the body of the HTTP request. To do that, we create a string with the temperature value, and wrap the string in a dictionary.
body = {'value': str(temperature)}
The header of the HTTP request contains other meta-data that the HTTP server will use to process the HTTP request. In particular, Adafruit IO server looks for the Adafruit IO Key inside the header. Again, we wrap the meta-data in a dictionary.
headers = {'X-AIO-Key': aio_key, 'Content-Type': 'application/json'}
Then, we send an HTTP request to the Adafruit IO server. Just like browsing the Internet, the HTTP connection may fail. Therefore, we need to handle the exceptions properly to prevent the crash of the program.
    try:
        r = requests.post(url, json=body, headers=headers)
        print(r.text)
    except Exception as e:
        print(e)
In the try block, we send an HTTP request with url, body and headers as the parameters. After the HTTP request is handled by Adafruit IO, an HTTP response will be received. We print the body of the response. If the request cannot be sent or handled properly, the exception will be printed.
Finally, the program pauses for 60 seconds before sending another data point is sent to Adafruit IO.
sleep(60)
Press Ctrl + F2 to restart the MicroPython REPL, then press F5 to run the script in Thonny.
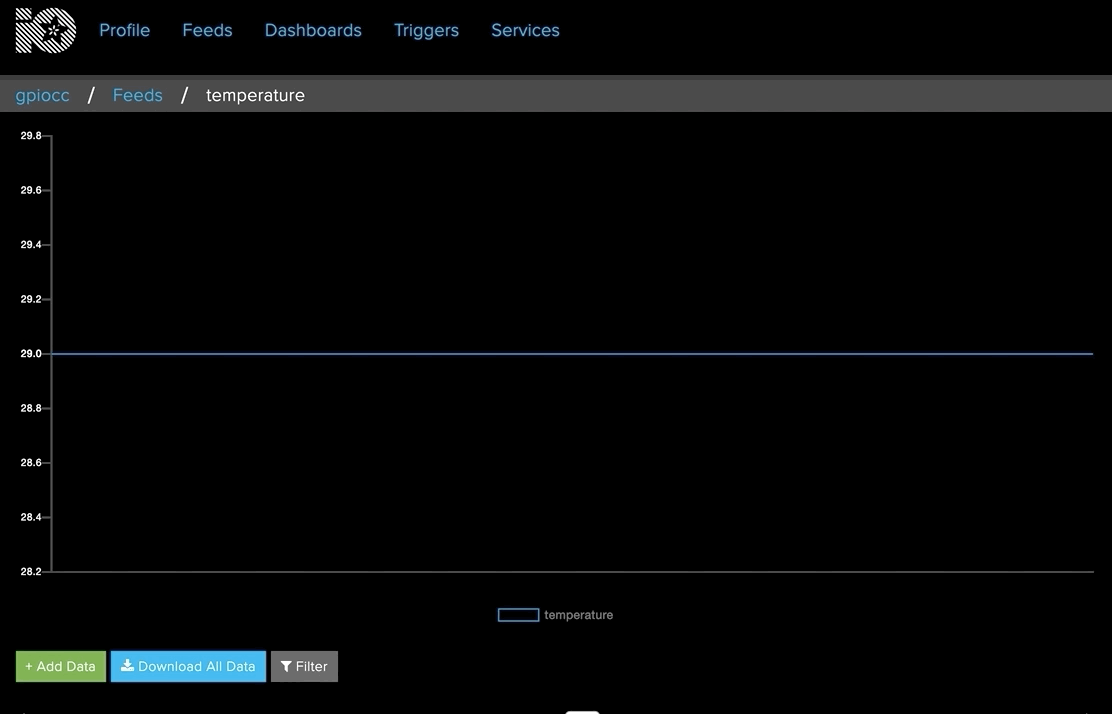
If you look at the feed page of ‘temperature’ on Adafruit IO, you can see a new data point is added every minute!
You may find the sample code here. Ask us on Facebook if you have any problem.
Make the Code Run Automatically at Bootup
You may want to place the sensor to somewhere far away from the computer. In this case, you need to make sure that the script runs automatically when the ESP32 is powered up. Fortunately, there is a very easy way to achieve this. All you need to do is to rename the python file to main.py and save it to the MicroPython file system on the ESP32.
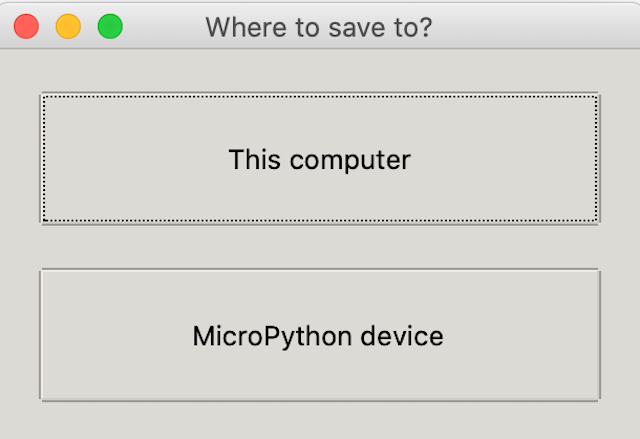
In Thonny, click File → Save as ….
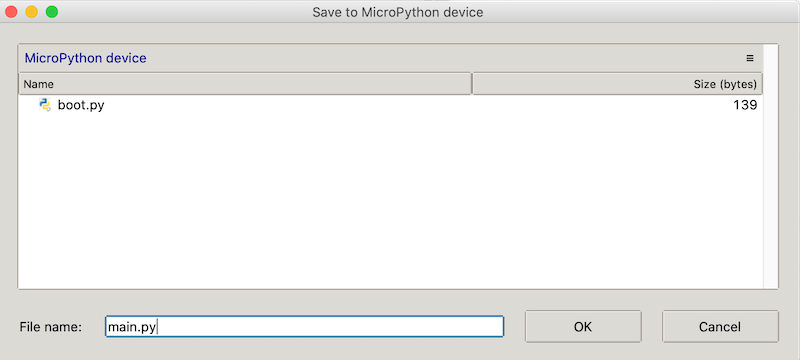
Thonny will ask you whether you want to save the script on the ESP32 or on the computer. Select ‘MicroPython device’.
Rename the file name of the python script to main.py.
After saving it, reboot the ESP32 by pressing the ‘EN’ button. main.py will run automatically!
Conclusion and Assignment
Sending data to the cloud is something that you will need to do all the time if you work on IoT devices. It is also possible to retrieve data from the cloud by using REST APIs. That means multiple IoT devices (even of different types, like Arduino and Raspberry Pi) can exchange data through the cloud and interact with each other. This paradigm will be used over and over again when you build more complicated IoT solutions.
To consolidate the knowledge, try doing the following as an assignment:
Create a feed called ‘humidity’ on Adafruit IO, update the feed with the humidity reading of the DHT11 every minute, and display the value with a gauge in a Dashboard of Adafruit IO.
You may check out this guide about using Adafruit IO’s Dashboard before doing the assignment. You may also find the sample code here. Ask us on Facebook if you have any problem.