Introduction
The ESP8266 and the ESP32 chips are low-cost microcontrollers with Wifi-capability. The ESP chips support TCP/IP communications, which means many networking tasks can be done with these small microcontrollers. Also, they can join an existing Wifi network, act as Wifi access points or do both at the same time. Moreover, they have many GPIOs that can be used for different purposes. Additionally, they can be programmed with a wide variety of tools, including Espressif’s own SDK (in C), Arduino and MicroPython. The flexibility of ESP boards enables makers to quickly turn their Arduino projects into IoT devices.
In this tutorial, we will learn:
- what a web server is
- how to make ESP32 work on Arduino IDE through Boards Manager
- how to install extra libraries to the Arduino IDE
- run a simple web server on ESP32
- handle HTTP requests with arguments on ESP32
- control the GPIOs with web pages
To achieve the above learning outcomes, we will setup a web server on an ESP32 board, and control a servo motor with a web page.
Materials and Tools
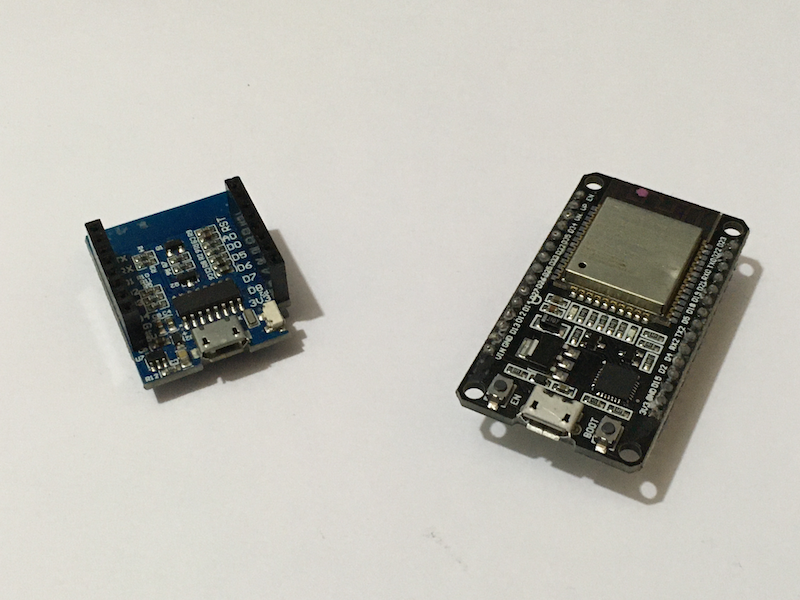
- ESP32 x 1
- SG90 servo motor x 1
- Jumper wires
A Very Brief Introduction to Web Server
On the Internet, different machines are communicating with each other. Since different kinds of communication have different requirements, so they need different communication protocols. Hyper Text Transfer Protocol (HTTP) is designed for, well, the transfer of hypertext (text with hyperlinks, usually in HTML format).
An HTTP transfer involves two parties: a client and a server. A client sends an HTTP request to a server. The server, which always listens to incoming HTTP requests, processes the requests and send the HTTP response to the client.
For example, when we enter a URL to a web browser, we send a HTTP GET request to a web server. The request contains information like the client’s IP address, the URL entered and some other parameters. On the other hand, the web server has been listening to new HTTP requests. Once the request is received, it extracts the information inside the HTTP request, do something with the extracted information, and return a HTTP response to the client. The response contains a code indicating the result of the HTTP request (e.g. ‘404’ means the requested resources cannot be found), as well as the resources that the client can be used (e.g. an HTML page).
In essence, a web server is just an application running on a computer that constantly listens to incoming HTTP requests, processes those requests and returns a response to the client. If you want to know more about HTTP, you may have a look of this introduction by the Mozilla Foundation.
Add ESP32 Support to Arduino IDE
ESP32 is Arduino-compatiable, which means you can write programs for ESP32 boards with the Arduino IDE and use many of the Arduino libraries. Before we can do that, we need to add the support for the ESP32 boards to the Arduino IDE. The easiest way is to use the board manager of the Arduino IDE.
First, in the menu of the Arduino IDE, click File → Preferences.
In ‘Additional Boards Manager URLs’, enter the following URL:
https://raw.githubusercontent.com/espressif/arduino-esp32/gh-pages/package_esp32_index.json
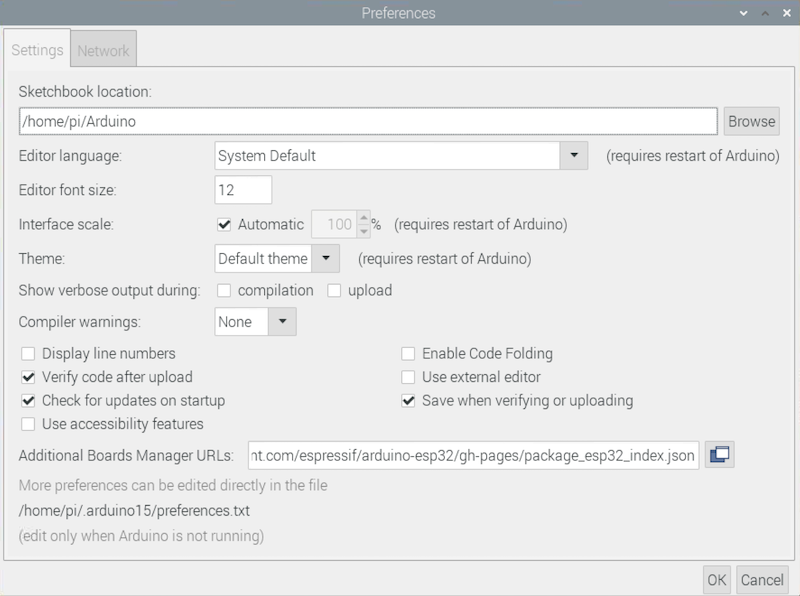
NOTE: If you have already added other URLs to this field, use commas to separate different URLs.
Click ‘OK’ to close the Preferences window. Then, click Tools → Board: [whatever board selected] → Boards Manager in the menu to open the Boards Manager.
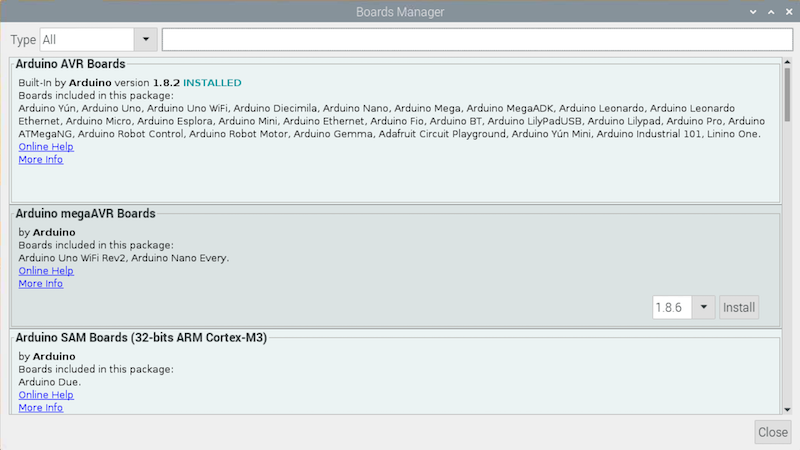
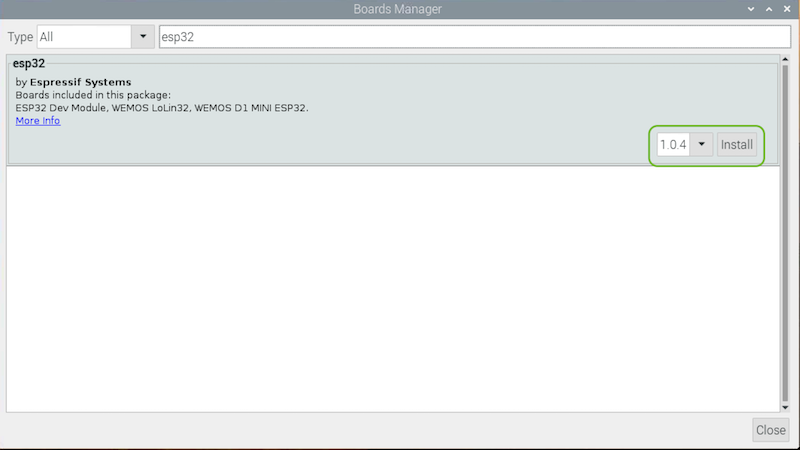
In the search field of the Boards Manager, enter ‘esp32’. Select ‘esp32 by Espressif System’, then click ‘Install’.
You may now use the ESP32 board in the same way as using an Arduino Uno. Let’s do a small test with the built-in LED. In a new sketch, write the following code:
const int LED_PIN = 2;

void setup() {
  pinMode(LED_PIN, OUTPUT);
}

void loop() {
  digitalWrite(LED_PIN, HIGH);
  delay(1000);
  digitalWrite(LED_PIN, LOW);
  delay(1000);
}
After writing the code, plug your ESP32 board to the computer. In the menu, click Tools → Board: [whatever board selected] → [The correct ESP32 board]. Also, you need to select the correct port by clicking Tools → Port → [The correct port connected to the ESP32].
Finally, click the ‘Upload’ button to upload the program to the ESP32. The built-in LED will start blinking.
NOTE: For some ESP32 boards, you may need to push the ‘EN’ and the ‘BOOT’ buttons on the board to get the uploading started.
Install the AsyncTCP and ESPAsyncWebServer Libraries
There are many ways to run a web server on a ESP32 with the Arduino IDE. However, if we use the AsyncTCP and the ESPAsyncWebServer libraries, the web server will run more efficiently. So, let’s go ahead and install these two libraries.
Visit the Github page for AsyncTCP. Then, click Clone or download → Download ZIP.
Similarly, visit the Github page for ESPAsyncWebServer and download the zip file of the library.
To import libraries, click Sketch → Include Library → Add .ZIP Library… in the menu. Then, select the zip file for AsyncTCP and click ‘OK’. Similarly, import the ESPAsyncWebServer library.
Run a Web Server on ESP32
To run a simple server, we will use the example sketch included in the ESPAsyncWebServer library. In the menu, click File → Examples → ESP Async WebServer → simple_server.
Find the following two lines of code and set the two constants to your router’s SSID and password respectively.
const char* ssid = "YOUR_SSID";
const char* password = "YOUR_PASSWORD";
Upload the program to the ESP32 board. That’s it! The web server is up and running. To verify that, click Tools → Serial Monitor. In the Serial Monitor, select ‘115200 baud’ in the baudrate dropdown menu. You should be able to see the IP address of the ESP32 board.

Open the browser on your computer or phone, and enter the IP address of the ESP32 board. You should be able to see the ‘Hello World’ webpage!
Let’s go through the sketch in details.
After importing some libraries, an object of the AsyncWebServer class called server is created with the port number 80 as the parameter of the constructor, which is the usual TCP/IP port number for an HTTP server:
AsyncWebServer server(80);
In the setup function, the ESP32 board connects to the Wifi network according to the SSID and the password you assign to the constants ssid and password. Once the connection is completed, the IP address is shown on the Serial Monitor.
Serial.begin(115200);
WiFi.mode(WIFI_STA);
WiFi.begin(ssid, password);
if (WiFi.waitForConnectResult() != WL_CONNECTED) {
    Serial.printf("WiFi Failed!\n");
    return;
}

Serial.print("IP Address: ");
Serial.println(WiFi.localIP());
Then, several handlers are created by calling the on function of server. These handlers determine what the server does when a new HTTP request is received. The on function takes three parameters: the relative path in the URL, the HTTP method and a callback function that will be called once the request with the designated relative path and HTTP method is received. Consider the first handler in the Arduino code:
server.on("/", HTTP_GET, [](AsyncWebServerRequest *request){
        request->send(200, "text/plain", "Hello, world");
});
When we enter http://[ESP32 IP Address]/ in a browser, an HTTP request with relative path / and HTTP method GET is received by the server. Therefore, the callback function [](AsyncWebServerRequest *request){request->send(200, "text/plain", "Hello, world");} is called. This sends an HTTP response back to the client with the HTTP code 200 and the text “Hello World”.
NOTE: The callback function takes an
AsyncWebServerRequestobject as the parameter when it is called.
NOTE: As we can see in this case, a function can be a parameter of another function. They are pretty much the same as other functions, except they don’t have a name.
Let’s look at another handler:
server.on("/get", HTTP_GET, [] (AsyncWebServerRequest *request) {
        String message;
        if (request->hasParam(PARAM_MESSAGE)) {
            message = request->getParam(PARAM_MESSAGE)->value();
        } else {
            message = "No message sent";
        }
        request->send(200, "text/plain", "Hello, GET: " + message);
    });
When we enter http://[ESP32 IP Address]/get in a browser, an HTTP request with relative path /get and HTTP method GET is received by the server. The designated callback function is called, but this callback function is much longer because it can parase the parameter inside the request. If the URL we enter is http://[ESP32 IP Address]/get?message=JAPAN, then the HTTP request will contain a parameter called ‘message’ and the value of the parameter is ‘JAPAN’.
How does this work? When the request is received by the server, the program will check if the ‘message’ parameter exists (see the line const char* PARAM_MESSAGE = "message"; of the sketch if you get confused by what PARAM_MESSAGE is). If this parameter exists, it will extract the value of this parameter, and assign it to the String-type variable message. Otherwise, "No message sent" is assigned to the String-type variable message. Finally, an HTTP response is sent back to the client with the HTTP code 200 and the text “Hello, GET: [whatever the message parameter is contained]”.
NOTE: The string variable has the same name as the URL’s parameter, but don’t get confused, they are completely two different things!
Use a Web Page to Control GPIOs
Check out this tutorial if you don’t have any experience of using a servo motor.
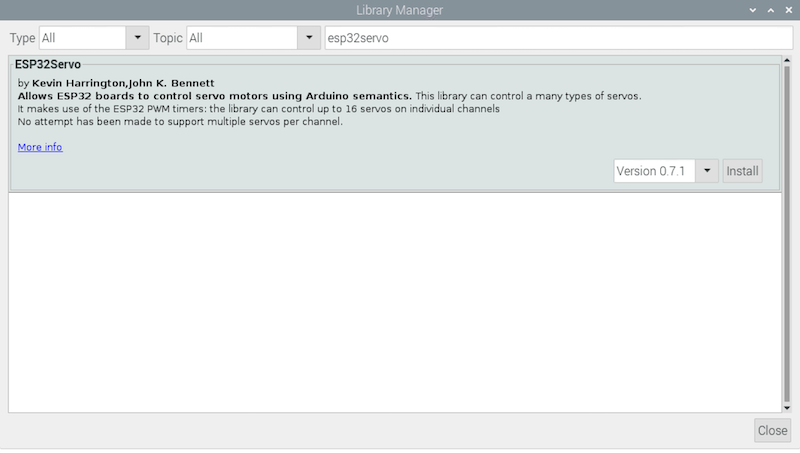
The built-in Servo library that comes with the Arduino IDE does not work. Therefore, we need to install an extra library. In the menu, click Tools → Manage Libraries. In the search field, type ‘esp32servo’. Then, select ESP32Servo and click ‘Install’.
After the installation, we can import the ESP32Servo library, and use it as the original one.
#include <ESP32Servo.h>

Servo myservo;
In the setup function, we assign a pin for sending the PWM signal to the servo motor by calling the attach function of the myservo object.
void setup(){
    // some other codes
    myservo.attach(2);
    // some other codes
}
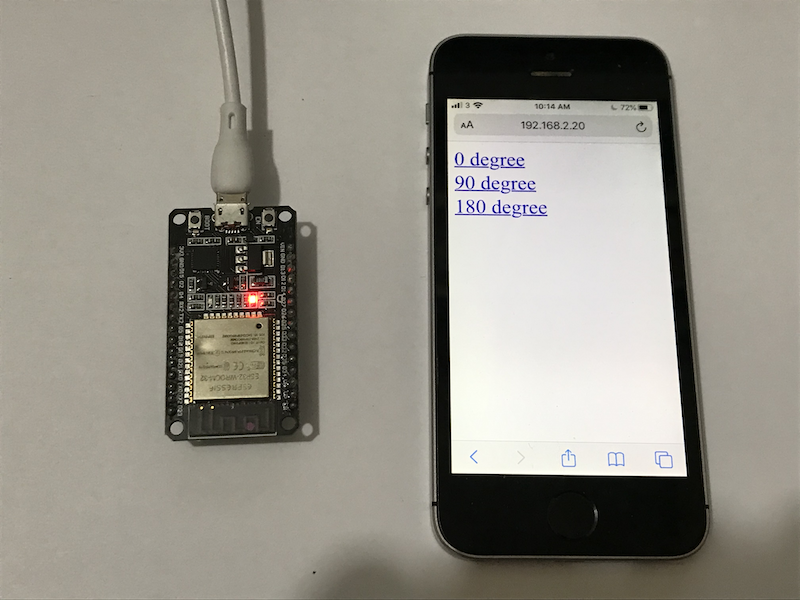
We need some HTML codes to display the webpage showing the controls. We will add three hyperlinks to the HTML page: ‘0 degree’, ‘90 degree’ and ‘180 degree’, each of them sends an HTTP GET request with a parameter called ‘angle’. Normally, the HTML page will look like the following one.
<!DOCTYPE html>
<html>
    <body>
        <a href='servo?angle=0'>0 degree</a>
        <br>
        <a href='servo?angle=90'>90 degree</a>
        <br>
        <a href='servo?angle=180'>180 degree</a>
    </body>
</html>
However, we need to put them into a route handler inside the Arduino code. Therefore, we add the following code to the setup function before server.begin();.
server.on("/servo", HTTP_GET, [](AsyncWebServerRequest *request){
        String pageHTML = "<!DOCTYPE html><html><body><a href='servo?angle=0'>0 degree</a><br><a href='servo?angle=90'>90 degree</a><br><a href='servo?angle=180'>180 degree</a></body></html>";

    });
The String object pageHTML holds the HTML contents to be displayed.
Then, we check whether the ‘degree’ parameter is contained in the HTTP request. If a valid ‘angle’ parameter exists, we turn the servo motor to the corresponding angle. To do that, add the if statement after the declaration of String pageHTML.
server.on("/servo", HTTP_GET, [](AsyncWebServerRequest *request){
        String pageHTML = "<!DOCTYPE html><html><body><a href='servo?angle=0'>0 degree</a><br><a href='servo?angle=90'>90 degree</a><br><a href='servo?angle=180'>180 degree</a></body></html>";

        // Add the following 'if' statement to the callback function
        if (request->hasParam("angle")) {
            String angle = request->getParam("angle")->value();
            if (angle == "0"){
                myservo.write(0);
            } else if (angle == "90"){
                myservo.write(90);
            } else if (angle == "180"){
                myservo.write(180);
            }
        }
        // Make sure the code is inside the last curly closing bracket!
    });
NOTE: The value of a parameter in an HTTP GET request is always a string. You need to do the conversion first if you want to compare the value with other integers or floats.
Finally, we send an HTTP response back to the client, which contains the HTML page.
server.on("/servo", HTTP_GET, [](AsyncWebServerRequest *request){
        String pageHTML = "<!DOCTYPE html><html><body><a href='servo?angle=0'>0 degree</a><br><a href='servo?angle=90'>90 degree</a><br><a href='servo?angle=180'>180 degree</a></body></html>";

        if (request->hasParam("degree")) {
            String angle = request->getParam("degree")->value();
            if (angle == "0"){
                myservo.write(0);
            } else if (angle == "90"){
                myservo.write(90);
            } else if (angle == "180"){
                myservo.write(180);
            }
        }
        // Add the following to send an HTTP response back to the client
        request->send(200, "text/html", pageHTML);
    });
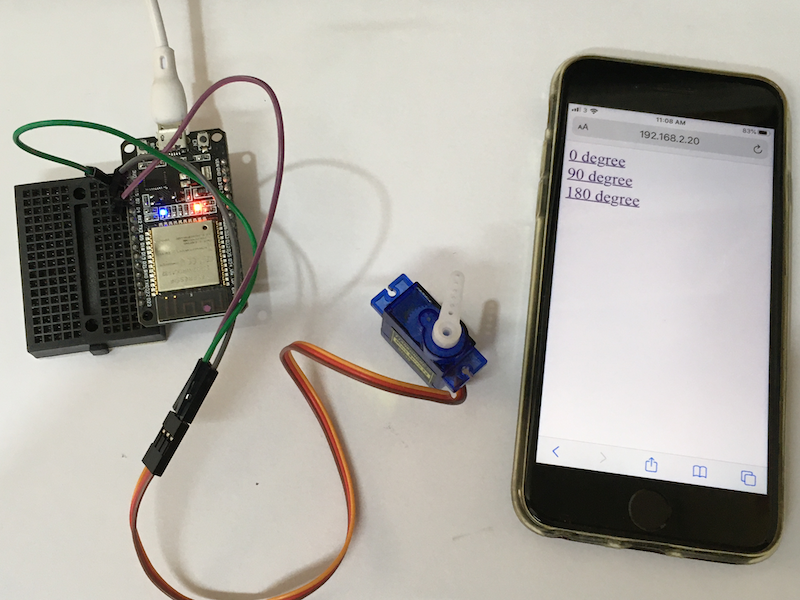
Upload the code to the ESP32 board and connect the servo motor to the ESP32 board.
| Servo motor | ESP32 |
|---|---|
| Power | 3.3V |
| Ground | GND |
| Signal | Pin 2 |
On your computer or phone, enter http://[ESP32 IP Address]/servo in a browser. The control page will be shown.
Click on one of those links, and the servo motor will turn accordingly!
If you have any problems, check out the sample code and ask us on our Facebook page.
Conclusion and Assignment
Running a web server on ESP32 may seems to be complicated. There are lots of skills that you need to master in order to make the project work. However, you will use those skills over and over again when you work on IoT projects in the future. Therefore, if you can clear up all the issues encountered during this tutorial, you will have a solid foundation for tackling related problems.
Also, it is always useful to learn more about modern web technologies. In fact, many concepts for making NodeJS web applications can be very similar to those for making ESP32 networking programs. You may want to check out this excellent book if you want to know more about NodeJS web applications.
To consolidate the knowledge, that’s do a simple assignment:
Add a handler to the Arduino code to display a web page that can turn an LED on and off.
You may find the answer here. Again, if you have any problems, ask us on our Facebook page.