Introduction
With suitable digital sensors, it is possible to measure temperature and humidity continuously. If we process the data with a computer or a microcontroller, and let it adjust the air-conditioning devices accordingly, we can keep the temperature and the humidity of an environment relatively stable. This simple design is the basis of many smart devices at home or in other places like factories.
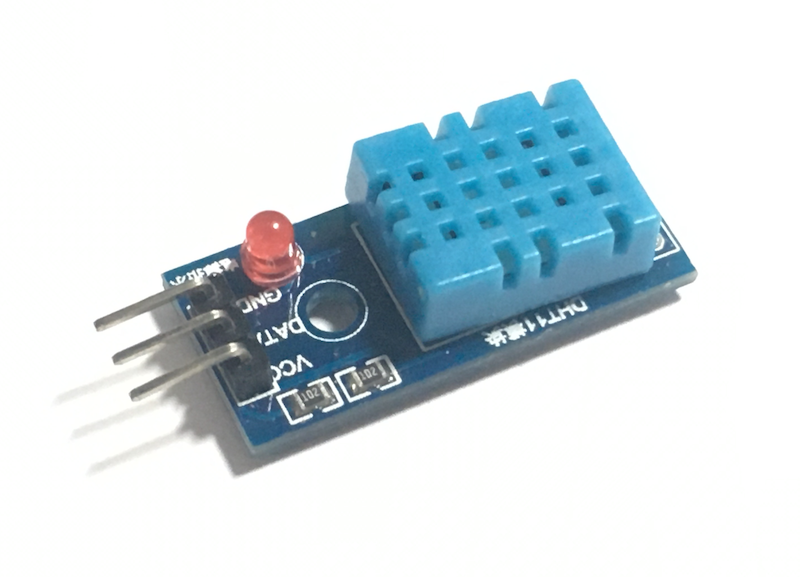
The DHT11 is an inexpensive sensor that can measure both temperature and humidity. It can be used with many common microcontrollers like Arduino. This time, we are going to use ESP32 and MicroPython to process the data from the sensor as MicroPython has built-in support of this sensor. Moreover, the Wifi-capable ESP32 can connect to the Internet. Later in another tutorial, we will send some data to the cloud and create simple IoT devices.
In this tutorial, we will learn:
- how to use the DHT11 sensor with ESP32 and MicroPython
- how to control other devices such as a fan with the data from the sensor
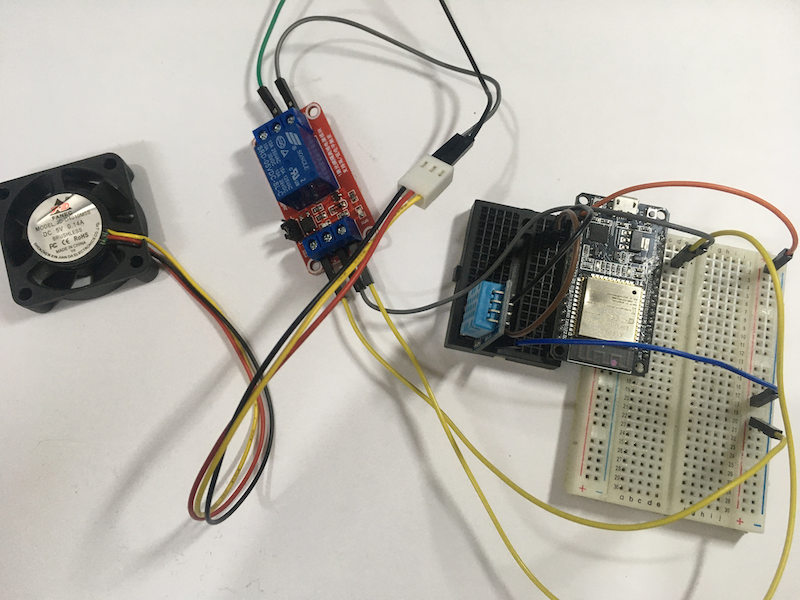
We will use the data from the DHT11 to turn a fan on and off:
Materials and Tools
- ESP32 x 1
- DHT11 sensor x 1
- CPU fan x 1
- 5V relay x 1
- CPU fan x 1
- 9V battery x 1
- Jumper wires
Connect the DHT11 to the ESP32
We first connect the DHT11 sensor to the ESP32. The connection is very straightforward. Make the connection according to the following table.
| DHT11 sensor | ESP32 |
|---|---|
| VCC | 3.3V |
| GND | GND |
| DATA | Pin 15 |
Read the Temperature and the Humidity
We then write some Python code to read the temperature and the humidity measured by the DHT11 sensor. Before writing any code, make sure you have followed this tutorial and flashed the MicroPython firmware to the ESP32 board, as well as configured the Thonny IDE to use the ESP32’s Python Interpreter. Once complete, we can start coding in Thonny.
First, we import the libraries required.
from machine import Pin
from dht import DHT11
As usual, we import the Pin class to get access to the GPIO of the ESP32, and the sleep function from the time library to pause the program for a period of time. Additionally, we import the DHT11 class from the dht library.
Next, we create an instance of the DHT11 class.
dht11 = DHT11(Pin(15))
We pass a Pin object with pin number 15 to the constructor of the DHT11 class. This line of code creates an instance of DHT11 that reads the data through the GPIO pin 15.
Then, we make the measurement and read the measured values.
while True:
    dht11.measure()
    temp = dht11.temperature()
    humid = dht11.humidity()
    print("Temperature: %.2f degree celsius; Humidity: %.2f percent" % (temp, humid))
    sleep(1)
When the measure method is called, the sensor will measure and record the data. The recorded temperature and humidity can be read by calling the temperature and the humidity method respectively. We store these two data to the temp and the humid variables.
Finally, we use the print method to print out the measured values. Note that the strings inside print are formatted strings:
"Temperature: %.2f degree celsius; Humidity: %.2f percent" % (temp, humid)
There are two parts of a formatted string. The first part is a normal string, except the values we want to show is replaced by %.2f. This tells the Python interpreter to substitute each of these parts with a float value correct to 2 decimal places. The second part is a vector containing the values to be substituted into the string. The two parts are connected by a % sign.
NOTE: Unfortunately, the convenient literal string
f"Some text {variable}"available since Python 3.6 does not work in MicroPython.
NOTE: The pause with
sleep()is necessary for using DHT11. Otherwise, a timeout exception will be thrown by the DHT11 object.
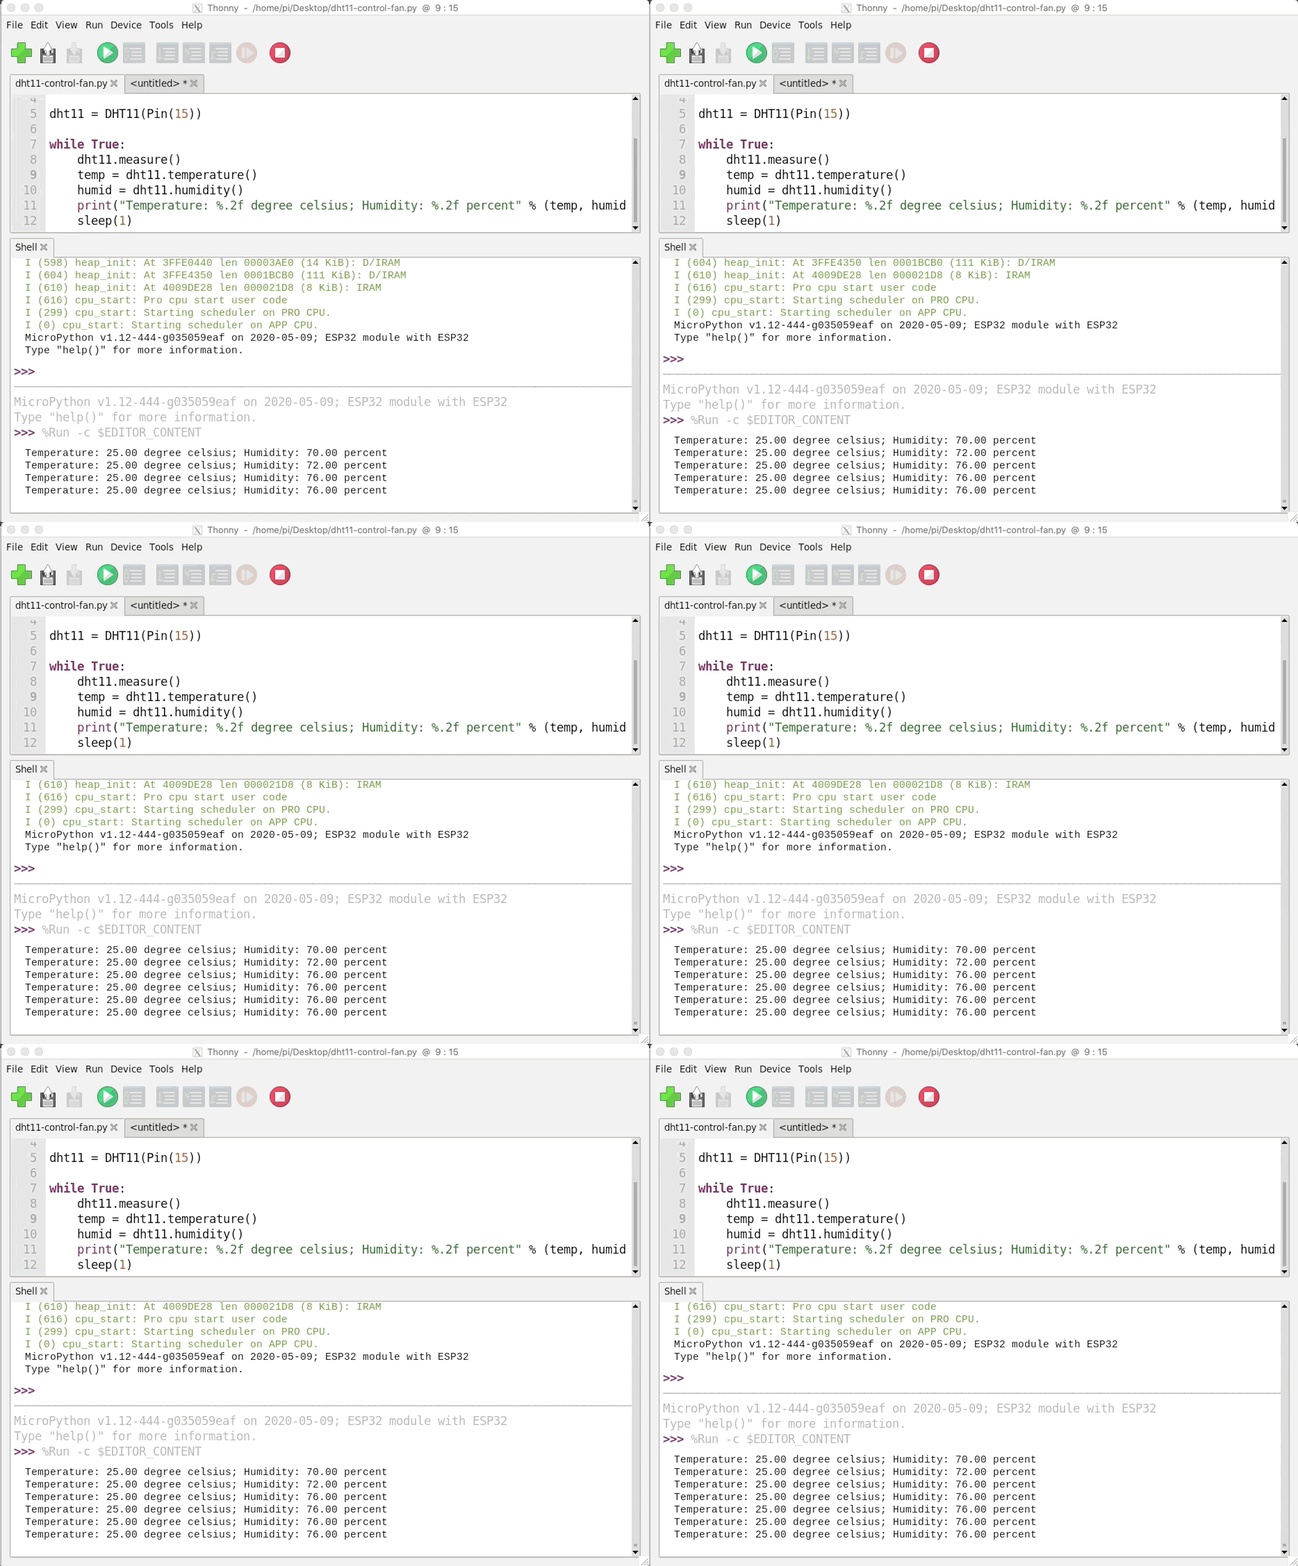
Save the program. Then, click the green Run current script button. You should be able to see the values being printed in the console.
You may find the sample code here. Ask us on Facebook if you have any problem.
Connections to the Relay
Next, we connect the relay to the fan and the ESP32. A relay is simply an electromagnetic switch.
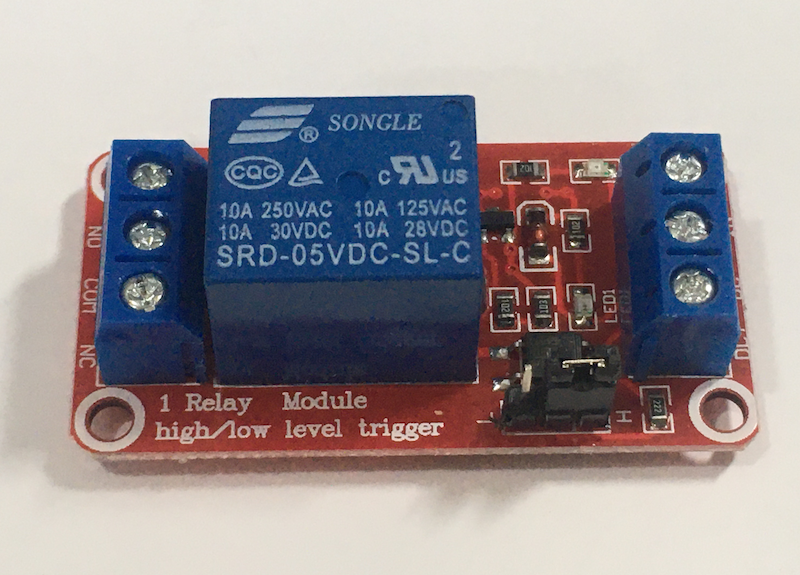
The side with ‘NO’ (normally open), ‘COM’ and ‘NC’ (normally close) is the switch of the relay:
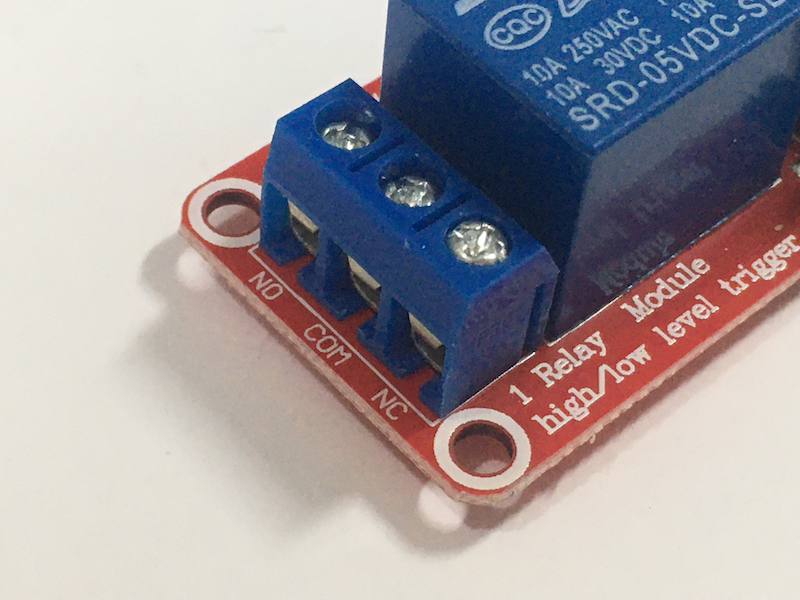
Connect the negative terminal of the fan to ‘COM’. Since we want the switch to be closed only when we send a digital HIGH signal to the relay, we connect the negative terminal of the battery to ‘NO’.
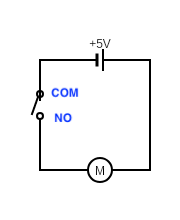
The other side is a small electromagnet that can open and close the switch.
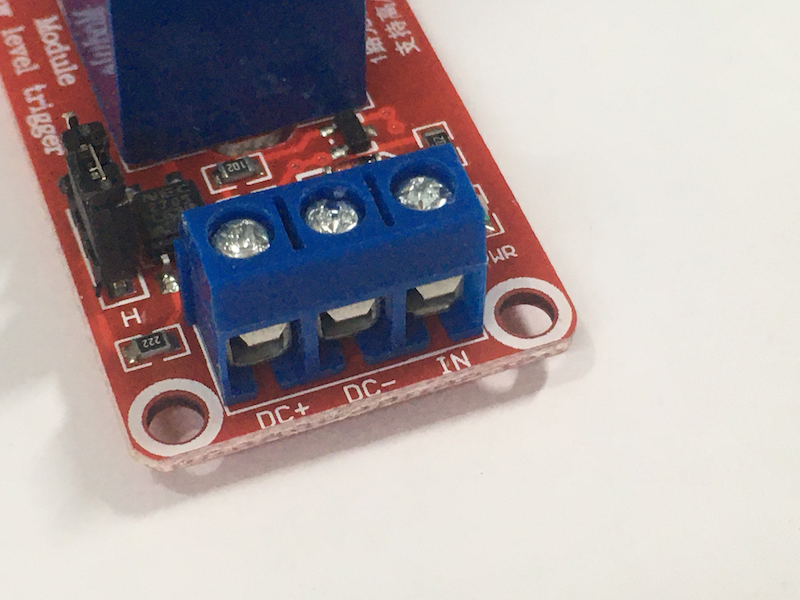
The connection between the relay and the ESP32 is also very straightforward:
| Relay | ESP32 |
|---|---|
| DC+ | 5V/VIN |
| DC- | GND |
| IN | Pin 13 |
Use the Sensor to Control the Relay
First, we need to create an instance of the Pin class to send digital signal to the relay. Add the following line after dht11 = DHT11(Pin(15)):
fan = Pin(13, Pin.OUT)
Rather than printing the data out, we want to use the value of the temperature to control the fan. Add the following codes after temp = dht11.temperature().
    if temp > 32:
        fan.on()
    else:
        fan.off()
In this conditional statement, we check if the temperature is above 32 degree celsius first. If it is, a digital HIGH signal is sent to the relay and the fan is turned on. Otherwise, a digital LOW signal is sent to the relay and the fan is turned off.
Click Stop/Restart backend → Run current script to run the program.
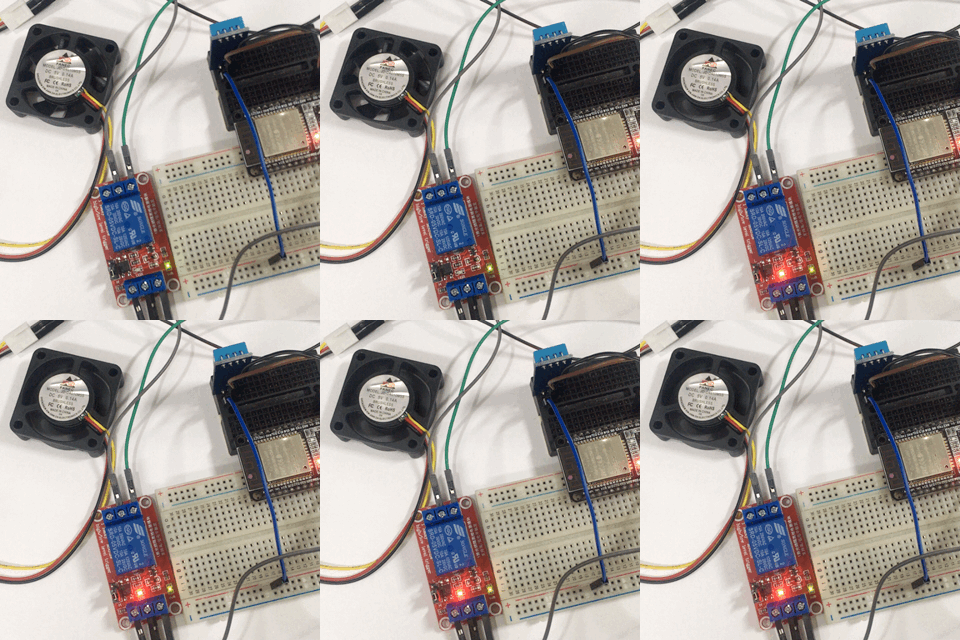
You may find the sample code here. Ask us on Facebook if you have any problem.
Conclusion
The DHT11 is a simple sensor to help us monitor both temperature and humidity. We can control other devices based on the values measured by the sensor. However, it is just half of the story. Since the ESP32 can connect to the Internet, it is possible to send data to the cloud for further processing. For example, the ESP32 may send a warning message to you via Telegram or Line when the temperature is abnormally high, and you may control the fan remotely over the Internet. This design paradigm will have even more practical applications.