Introduction
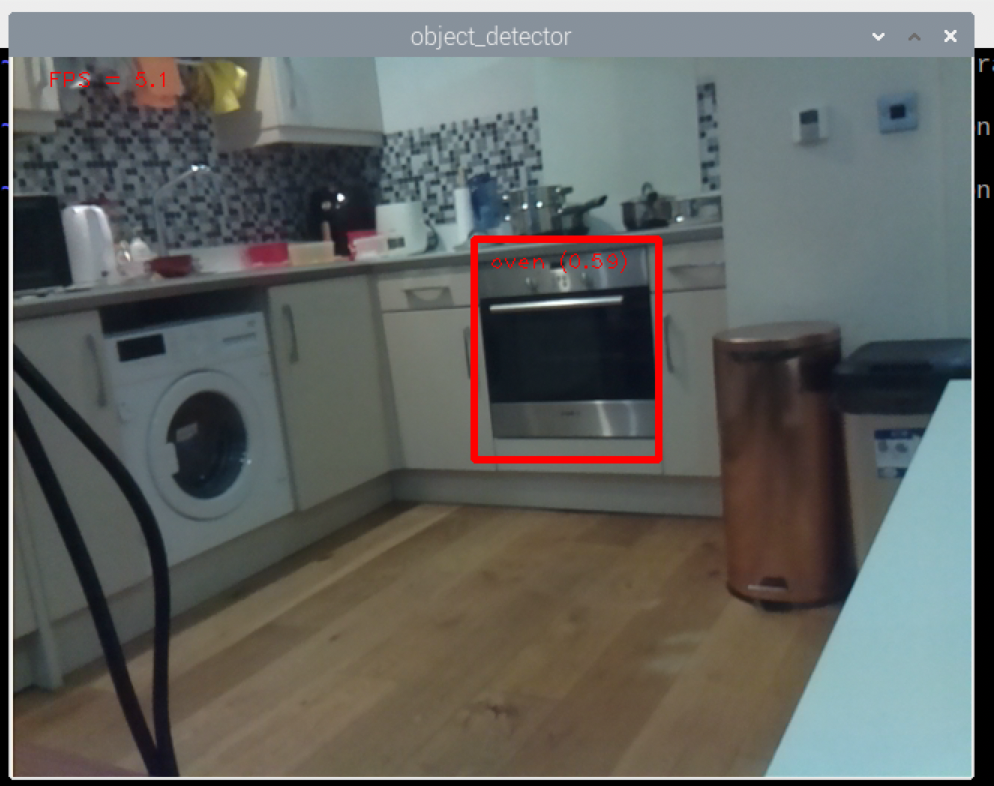
In the old tutorial, we used TensorFlow Lite on a Raspberry Pi to perform object detection. Since the article was written, the installation of the TensorFlow Lite library as well as the object detection example from TensorFlow have been changed quite significantly. In this tutorial, we will explore how we can run the new TensorFlow Lite object detection example on Raspberry Pi.
Setup Raspberry Pi camera
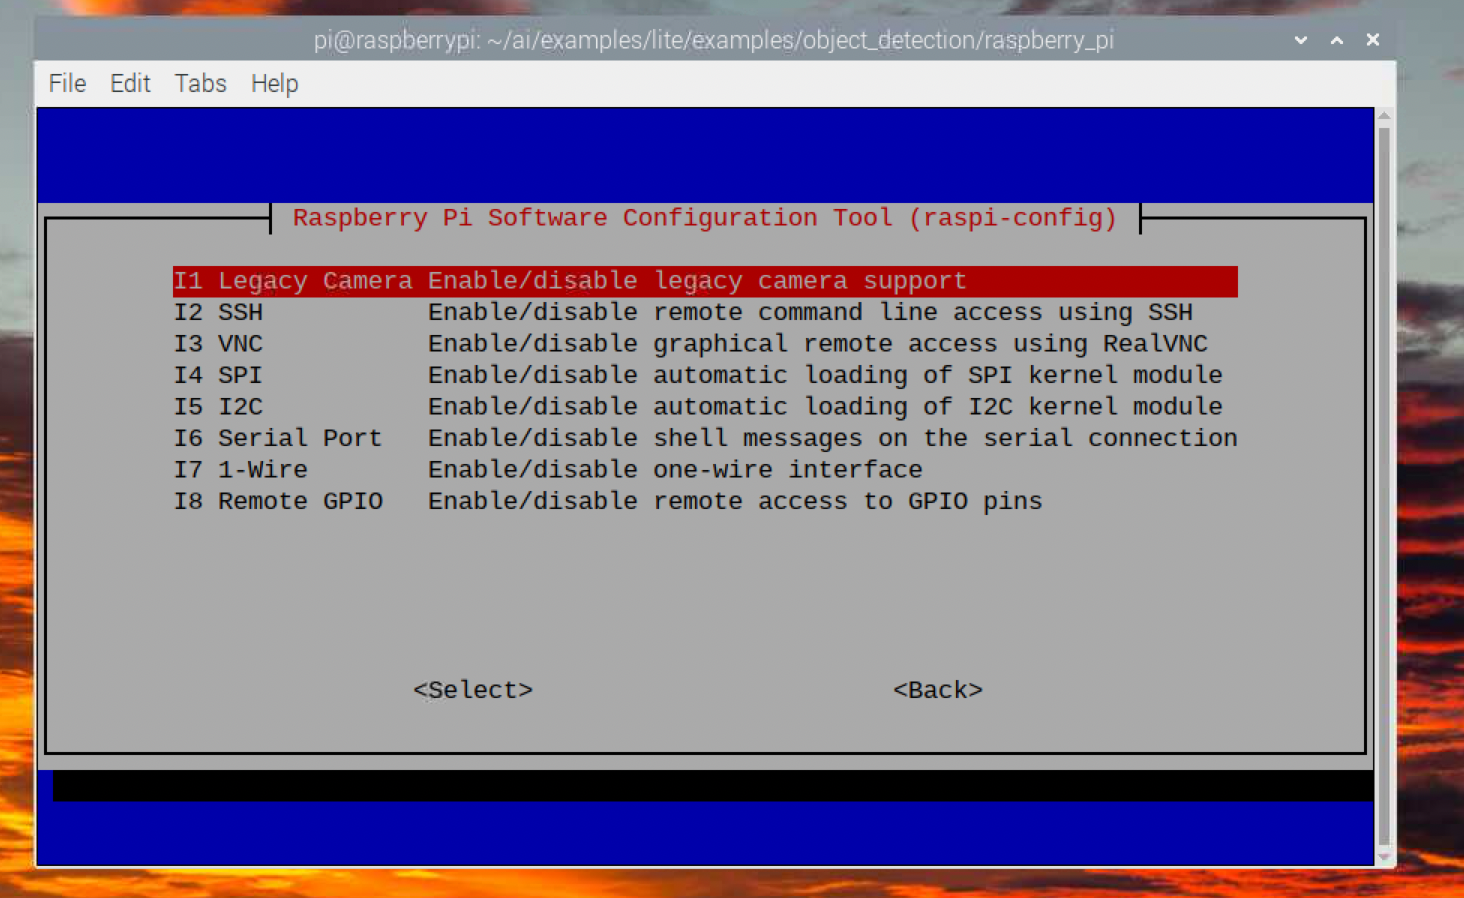
For connecting the Raspberry Pi camera to the Pi, the process is the same as in the old tutorial. However, the step for enabling it for our object detection program is different. The ‘Camera’ option in the ‘Interfacing Options’ menu inside raspi-config has been changed to ‘Legacy Camera’ because of a major update in the camera APIs of the Raspberry Pi OS.
To enable ‘Legacy Camera’, we need to launch the raspi-config program in the terminal.
pi@raspberrypi:~$ sudo raspi-config
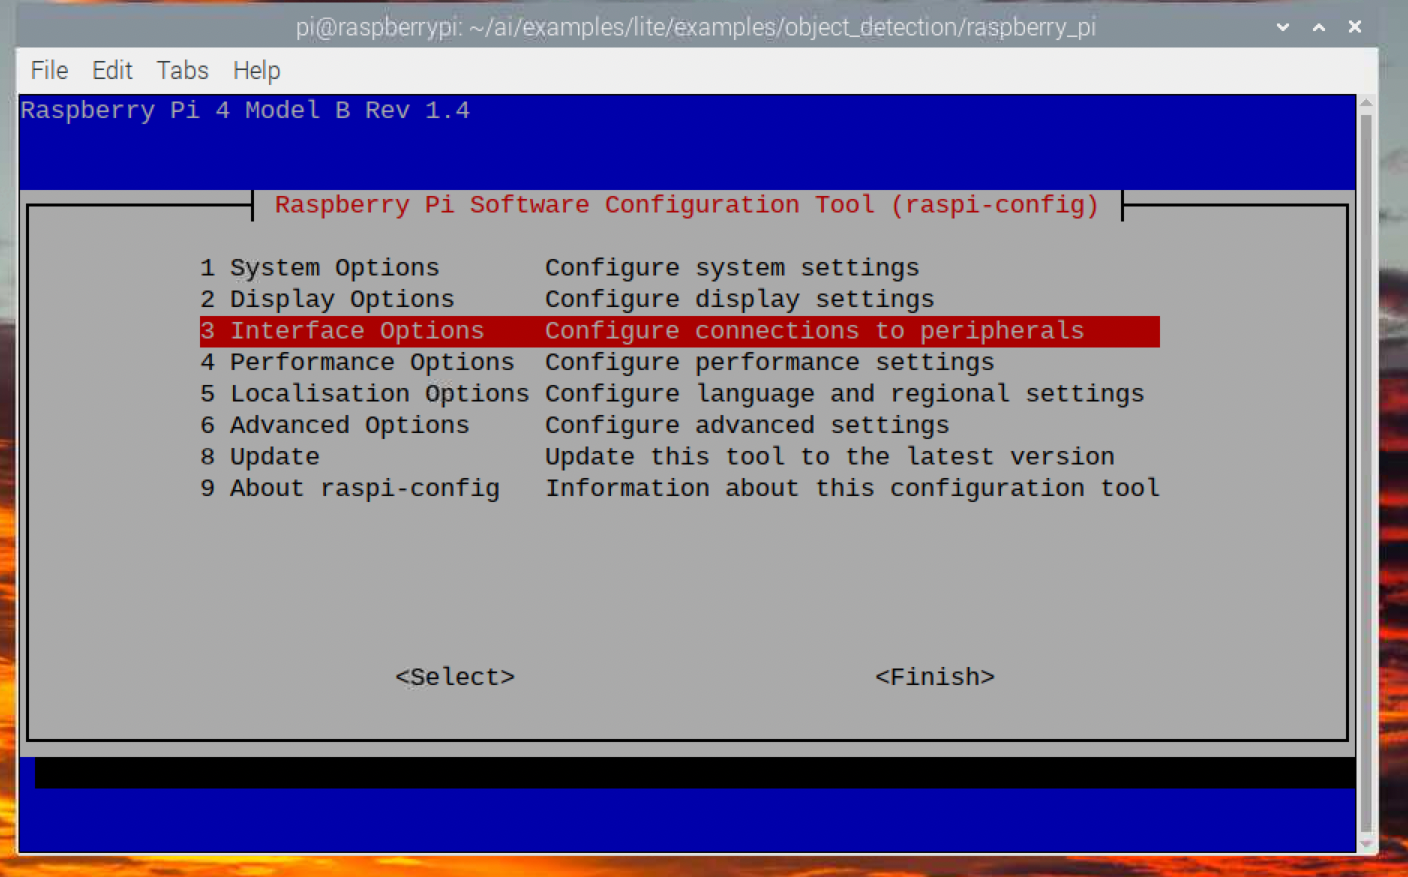
Then, move down to ‘Interface Options’ and press ENTER.
The cursor should be at ‘Legacy Camera’. Press ENTER.
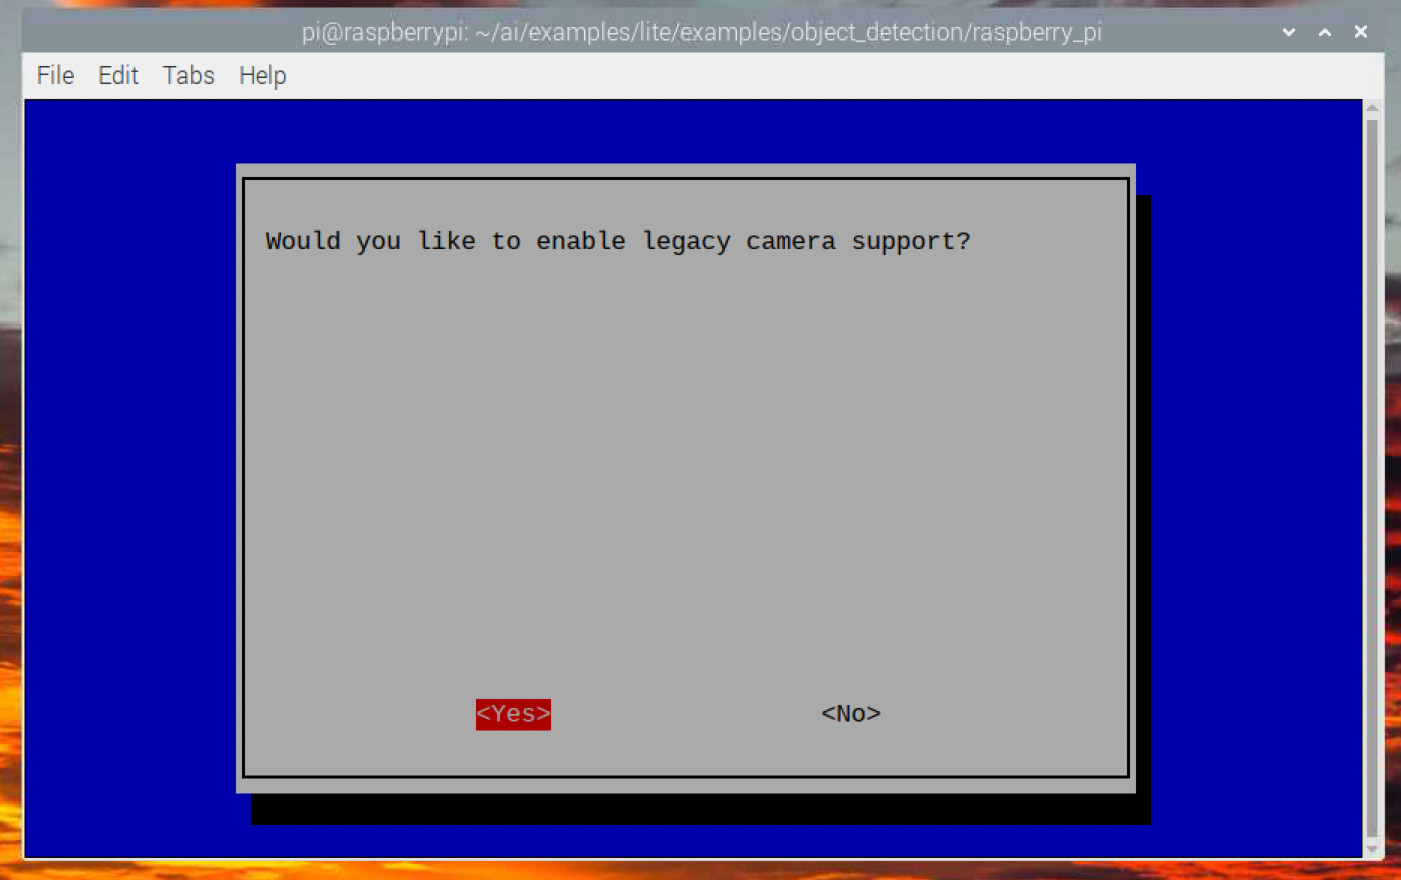
Then, select ‘Yes’.
After going back to the main menu, select ‘Finish’ to close the raspi-config program. You need to reboot your Raspberry Pi.
Install TensorFlow Lite
Before we install TensorFlow Lite, we first need to install the libatlas-base-dev package, which is used by the TensorFlow Lite runtime. We can install it using apt.
pi@raspberrypi:~/$ sudo apt update
pi@raspberrypi:~/$ sudo apt install libatlas-base-dev -y
After the installation, we create a folder for storing our files.
pi@raspberrypi:~/$ mkdir ai && cd ai
Next, we create a virtual environment called tfl.
pi@raspberrypi:~/ai$ python3 -m venv tfl --system-site-packages
NOTE: The flag
--system-site-packagesis added so that we can get access to system packages likeRPi.GPIOwhen we use the virtual environment.
After the command is executed, a new folder tfl is created. The folder will contain all the Python libraries that can be used only if you activate this specific virtual environment. Everytime we activate the tfl virtual environment, we need to execute the tfl/bin/activate file with the source command.
pi@raspberrypi:~/ai$ source tfl/bin/activate
From now, (tfl) will be shown in every line you enter in the terminal.
When we create a new virtual environment, we should always update the pip module inside the virtual environment first.
(tfl) pi@raspberrypi:~/ai$ pip install --upgrade pip
We are now ready to install the TensorFlow Lite runtime. The installation can be done by a straightforward pip command.
(tfl) pi@raspberrypi:~/ai$ pip install tflite-runtime
Download and Run the Example
Let’s download the example from the TensorFlow’s Github repository.
(tfl) pi@raspberrypi:~/ai$ git clone https://github.com/tensorflow/examples.git
NOTE: In the old tutorial, we also downloaded some pretrained models. However, those old models can no longer be used in the new examples as the updated TensorFlow Lite APIs require the models to include essential metadata. Our latest tutorial on training custom object detection model will produce models with metadata so you should definitely check that out.
Then, navigate to the folder containing the object detection example.
(tfl) pi@raspberrypi:~/ai$ cd examples/lite/examples/object_detection/raspberry_pi
There are a number of Python libraries that need to be installed and we need to download some pretrained models to run the program. Fortunately, all we need to do is to execute the shell script setup.sh inside the raspberry_pi folder.
(tfl) pi@raspberrypi:~/ai/examples/lite/examples/object_detection/raspberry_pi$ sh setup.sh
Run the Program
After the installation, we can execute the script detect.py to run the object detection program.
(tfl) pi@raspberrypi:~/ai/examples/lite/examples/object_detection/raspberry_pi$ python detect.py
That’s it! The program will use the default model efficientdet_lite0.tflite to perform object detection.
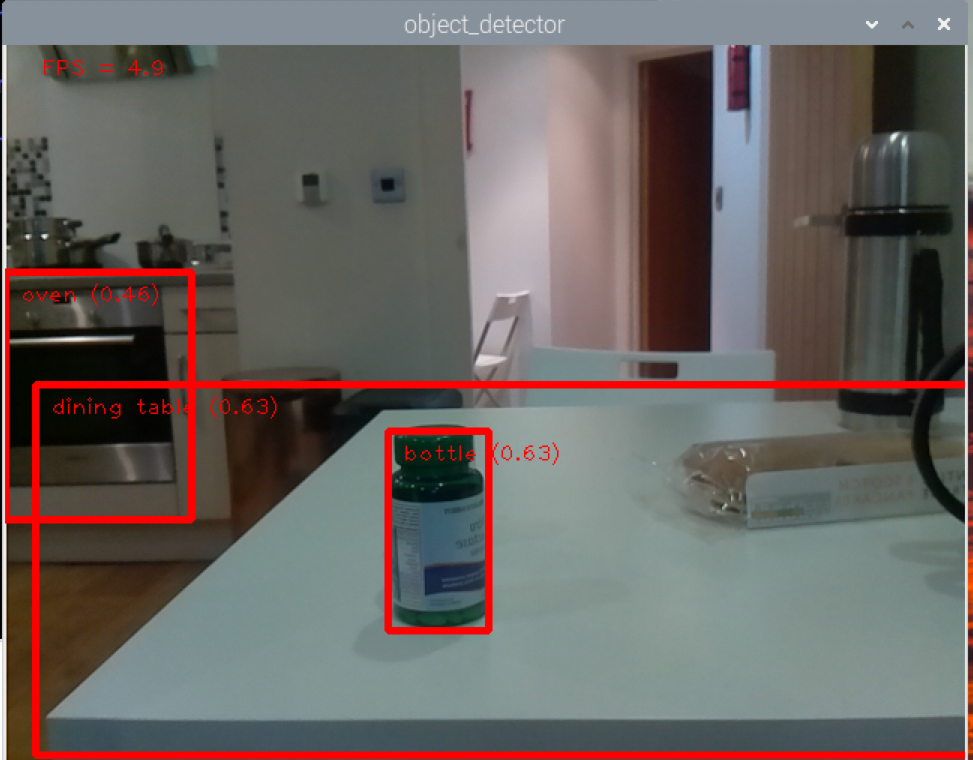
There are quite a few parameters that we can change by adding the following flags after the python detect.py command:
--model: We can specify the path to the model that we want to use. Without this flag, the modelefficientdet_lite0.tflitewill be used.--frameWidthand--frameHeight: We can specify the size of the captured image with these two flags.--numThreads: The number of CPU threads to run the program.--enableEdgeTPU: Whether to run the model on EdgeTPU. Note that if this flag is set toTrue, we need to use a model that’s optimised for EdgeTPU.
Unlike the old object detection program, the new one uses OpenCV instead of PiCamera for capturing and displaying video, which means the video can be seen even if the HDMI 2 port or VNC is used. To close the program, press Esc twice.
Conclusion
The new installation method of the TensorFlow Lite runtime and the new object detection example make it easier for us to perform object detection on Raspberry Pi. By combining with the custom object detection models that we can make with TensorFlow Lite Model Maker, there are endless possibilities of what we can do. In the next tutorial, we will modify this example to make our own object tracking camera.