Introduction
In the previous tutorial, we use TensorFlow Lite and pre-trained models to perform object detection on Raspberry Pi. Wouldn’t it be nice if we can train our own object detection models? While we don’t have something like the Teachable Machine for object detection, we still can train custom object detection models relatively easily with the new TensorFlow Lite Model Maker.
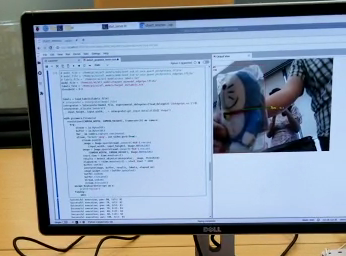
Just like what we did for image classification, the first step of training a custom object detection model is to create a labelled dataset. However, taking and handling hundreds (or even thousands) of photos can be time-consuming. To speed up the workflow, we will take a few videos first, and then extract the photos from the videos. Specifically, we will:
- capture videos with the Raspberry Pi camera
- use ffmpeg to turn video frames into images
- separate image files for training and testing
- annotate images with labelImg
We can do all of the above on a Raspberry Pi. Let’s get started.
Capture Videos with the Raspberry Pi Camera
Connect the camera module to the Raspberry Pi and enable it if you have not done so (see this tutorial for the instructions). Once the camera is ready, we can use the raspivid command to capture videos. For example, the following command will record a video of size 640 x 480 at 25 FPS for 10 seconds.
pi@raspberrypi:~ $ raspivid -o video1.h264 -t 10000 -w 640 -h 480 -fps 25
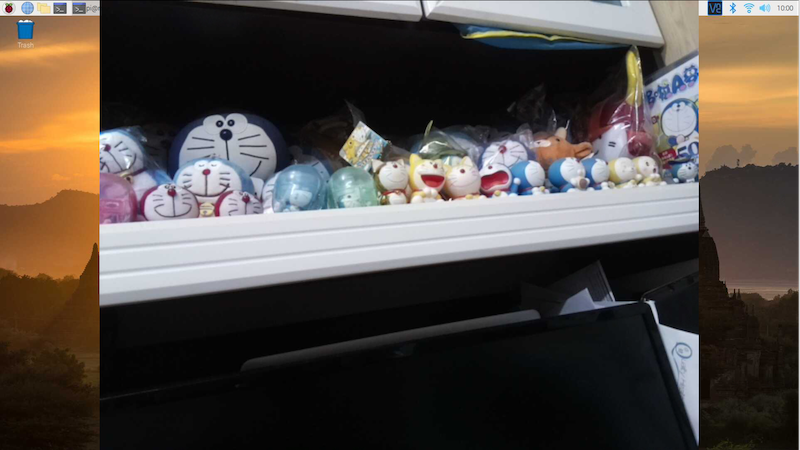
The video is stored in the video1.h264 file. You should take a few more videos with the objects you want to detect to create a much more representative dataset for training a better model.
Note: The Pi captures video as a raw H264 video stream. The VLC player can play it but other media players may not, or play it at an incorrect speed. Check out the Raspberry Pi official documentation if you want to know more about this.
Use ffmpeg to Turn Video Frames into Images
Once we have recorded a few videos, we can extract the images from the videos with the ffmpeg program.
Firstly, let’s create a new folder raw_images for storing the extracted images.
pi@raspberrypi:~ $ mkdir raw_images
Then, we extract the images by using the ffmpeg command.
pi@raspberrypi:~ $ ffmpeg -i video1.h264 -vf fps=25 raw_images/video1_img%03d.jpg
Do the same for the rest of the videos.
Use Python to Create Training, Validating and Testing Datasets
If a model memorizes the training data, it will perform extremely well during training but very poorly when non-training data are fed to the model. This problem is known as overfitting. A simple, effective way to prevent this problem is using cross validation. When training the model, we do not use the entire set of data. The data that have not been used during training are used for checking whether the model can generalize well. Generally, we can divide a dataset into the following three subsets:
- Training dataset: for training the model
- Validation dataset: for checking the model’s performance during after each iteration (epoch) of training
- Testing dataset: for evaluating the model’s performance after the training
We will use Python to help us randomly separate the images into 3 sets. We use 80% of the images for training, 10% of the images for validating and 10% of the image for testing.
First, we import a few Python modules.
import os
import pathlib
import shutil
import random
Next, we define a few variables for the paths of the folders that we are working on.
working_dir = pathlib.Path.home() # the home directory
src_dir = os.path.join(working_dir, 'raw_images') # ~/raw_images
src_dir = pathlib.Path(src_dir) # convert the path into a Path object
data_dir = os.path.join(working_dir, 'data')
The data folder in the home directory will be used to store the images and the annotations later.
Then, we create the folders for storing the images and the annotations.
folders = ["training", "validation", "testing"]
dirs = [os.path.join(data_dir, f) for f in folders]
img_dirs = [os.path.join(d, "images") for d in dirs]
annotation_dirs = [os.path.join(d, "annotations") for d in dirs]

pathlib.Path(data_dir).mkdir(exist_ok=True)

for d in dirs + img_dirs + annotation_dirs:
    pathlib.Path(d).mkdir(exist_ok=True)
Inside the data folder, we create three folders training, validation and testing. In each of these folders, we create two folders images and annotations.
Next, we get the list of files inside the raw_images folder and count the number of images.
image_files = list(src_dir.glob("*.jpg"))
num_of_images = len(image_files)
print(f"Num of images: {num_of_images}")
Before we split the image files into 3 different subsets, we should shuffle the list of images to make each subset more representative.
random.shuffle(image_files)
Then, we define indices at which the list is splitted. The first 80% of the list is for training, the next 10% is for validating, and the rest is for testing. Therefore, the indices can be defined as follows.
train_split = int(0.8 * num_of_images)
valid_split = int(0.9 * num_of_images)
The list can then be splitted with the indices.
train_files = image_files[:train_split]
valid_files = image_files[train_split:valid_split]
test_files = image_files[valid_split:]
Finally, we use a nested for loop to copy the image files from the raw_images folder to the destination folders.
for src, dest in zip([train_files, valid_files, test_files], img_dirs):
    for f in src:
        shutil.copy(f, dest)
The complete Python script can be found here. Execute it in the Thonny IDE or in the terminal and the datasets will be created.
Annotate Images with labelimg
As seen in the previous tutorial, the inference result of an object detection model contains two things: a bounding box and a label. Therefore, the images in a labelled datasets for training an object detection model have to be annotated first. This time, we will use labelImg to annotate the images.
First, we download labelimg from Github.
pi@raspberrypi:~ $ git clone https://github.com/tzutalin/labelImg --depth=1
Then, we install the dependencies of labelImg.
pi@raspberrypi:~ $ sudo apt update
pi@raspberrypi:~ $ sudo apt install -y pyqt5-dev-tools
pi@raspberrypi:~ $ cd labelImg
pi@raspberrypi:~/labelImg $ sudo pip3 install -r requirements/requirements-linux-python3.txt
pi@raspberrypi:~/labelImg $ make qt5py3
After the dependencies are installed, we can launch labelImg.
pi@raspberrypi:~/labelImg $ python3 labelImg.py
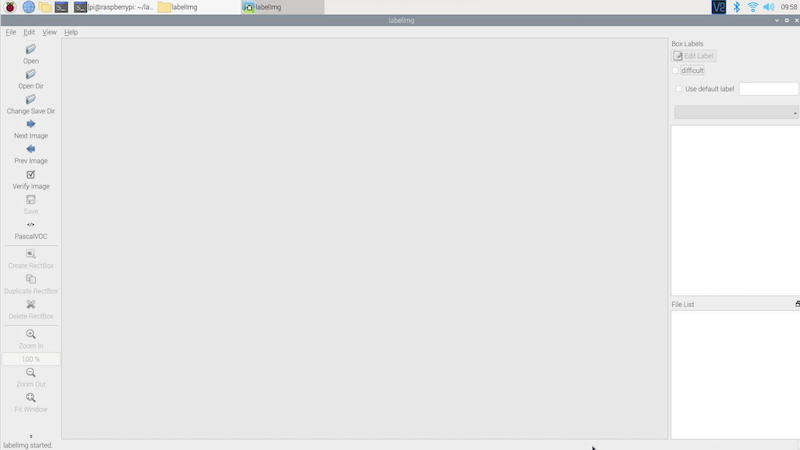
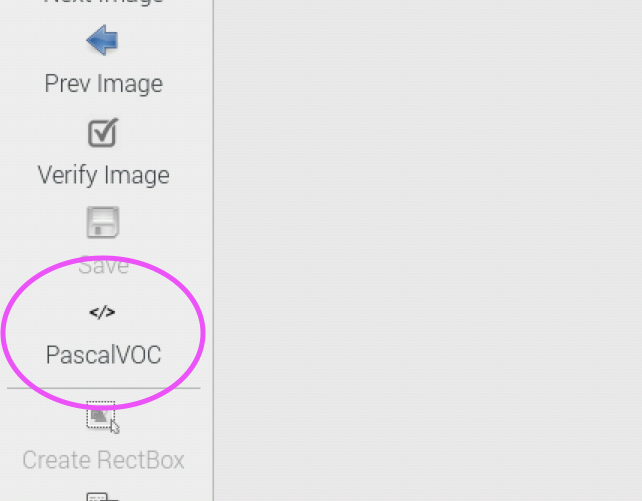
Since we will use TensorFlow Lite Model Maker later, we save the annotations as XML files in PASCAL VOC format. Make sure that PASCAL VOC is selected on the left hand menu.
Next, we open the folder containing the training images. Click the Open Dir button on the left and select the folder ~/data/training/images.
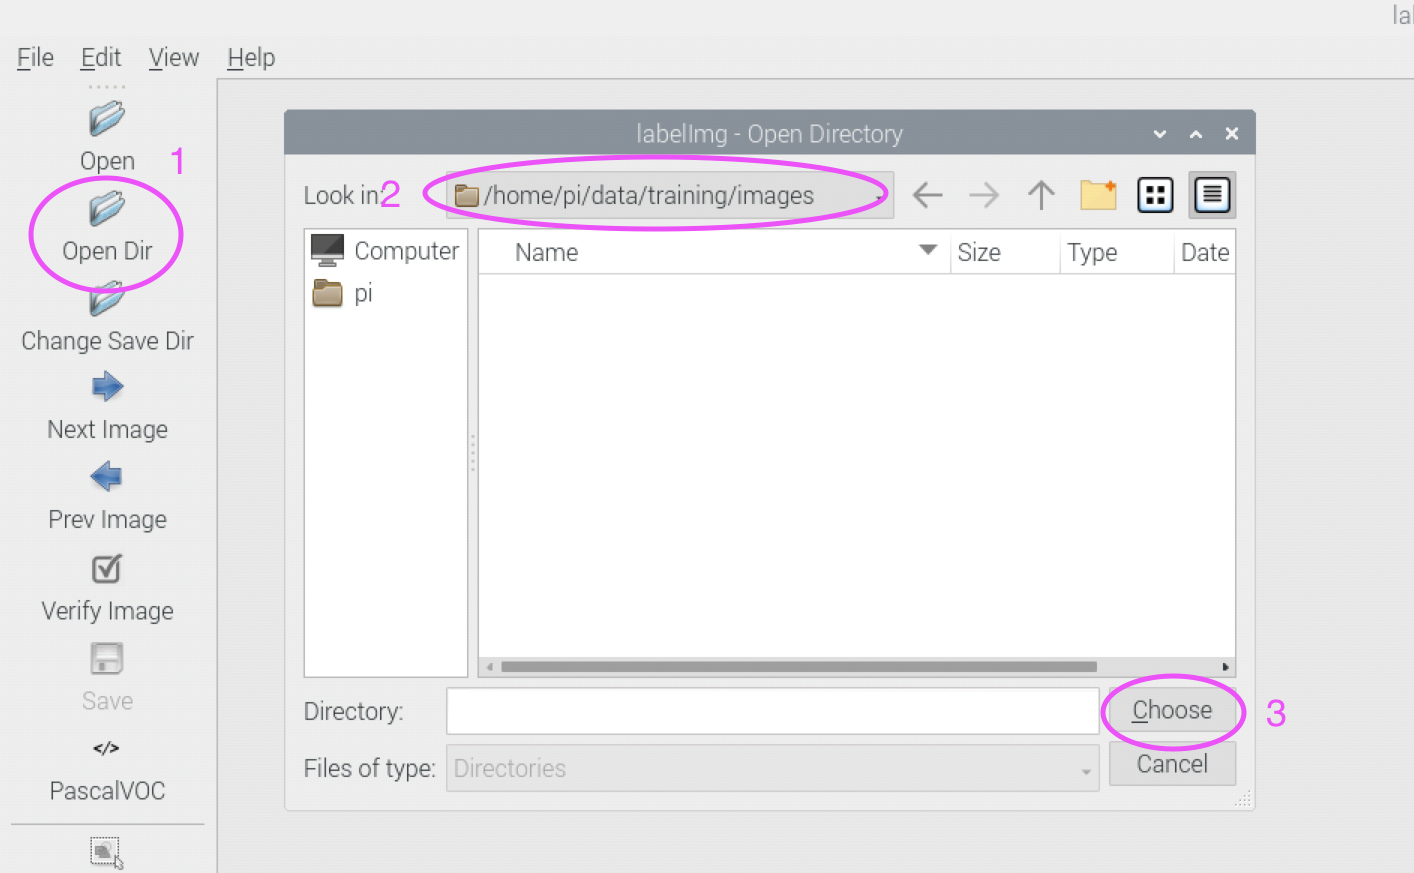
We need to specify the folder for saving the annotations as well. Click the Change Save Dir button on the left and select the folder ~/data/training/annotations.
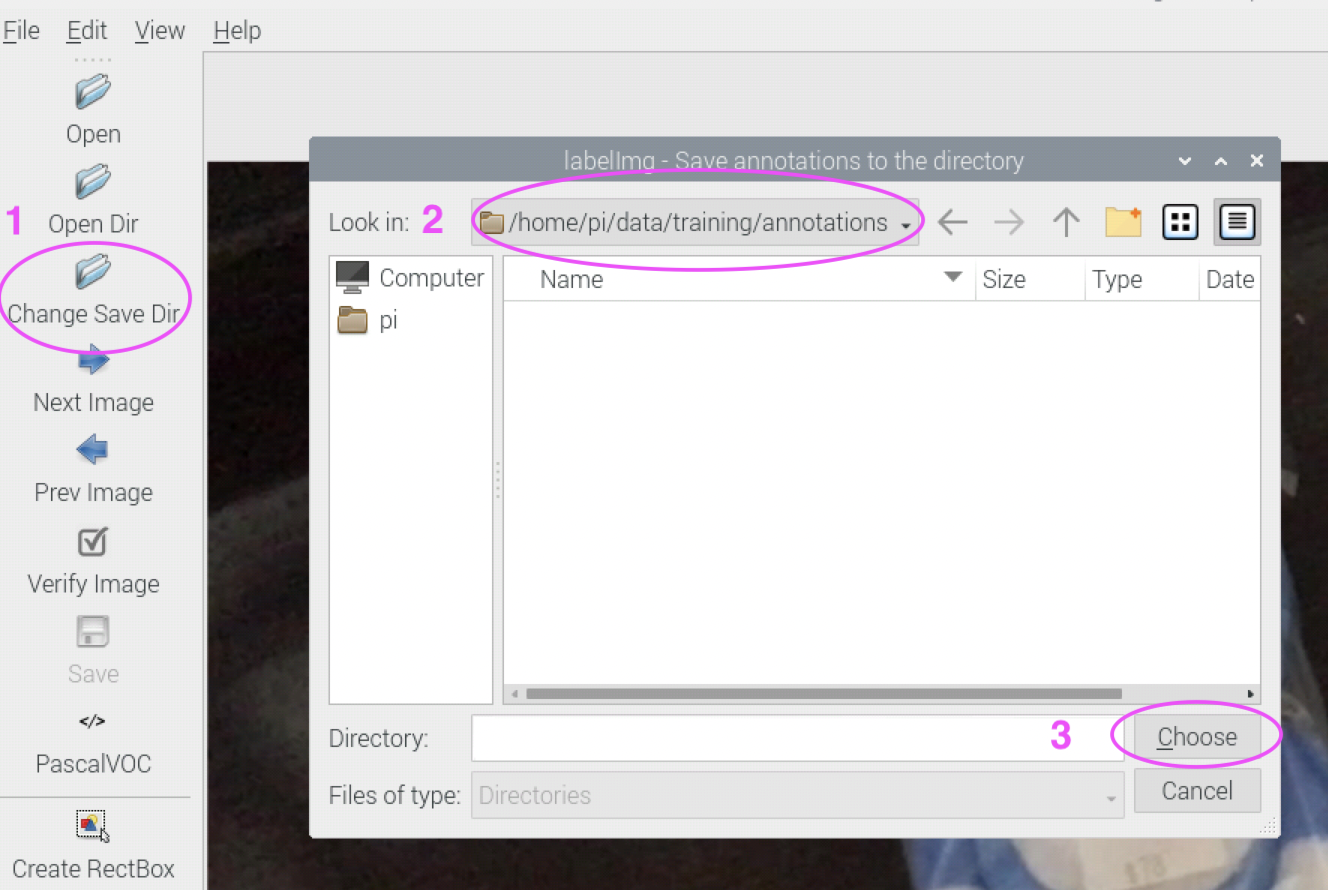
With the directories all set, we can start annotating the training images. Press ‘w’ on the keyboard or click Create RectBox on the left menu.
Note: Since we often need to annotate a large number of images (hundreds or even thousands), it’s more efficient to use the hot keys of labelImg. The full list of available hot keys can be found here.
Draw a bounding box on the area of the image where the object is placed. A dialog box will ask you to input the label of the object. Type the label of the object and click OK. You can draw multiple bounding boxes with different labels on the same image if the image contains multiple objects that you want to detect.
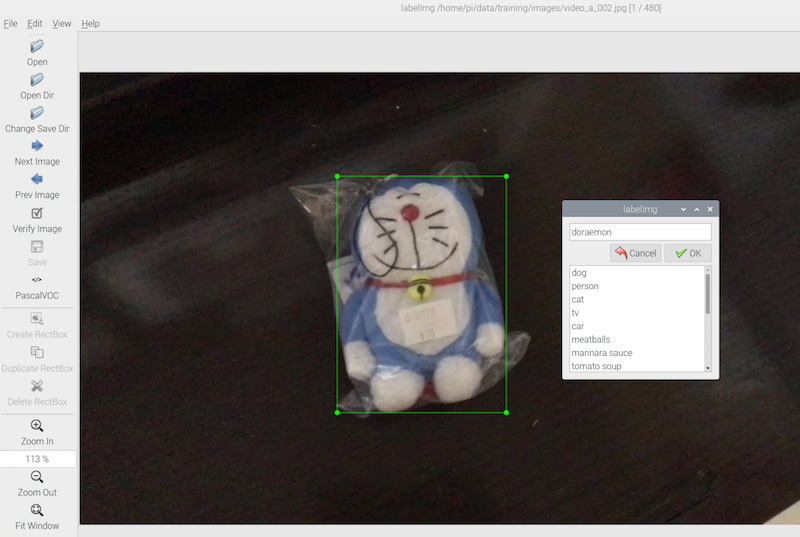
If your model only detects one kind of objects, you may choose the Use default label option on the right. The default label will be applied automatically once a new bounding box is drawn.
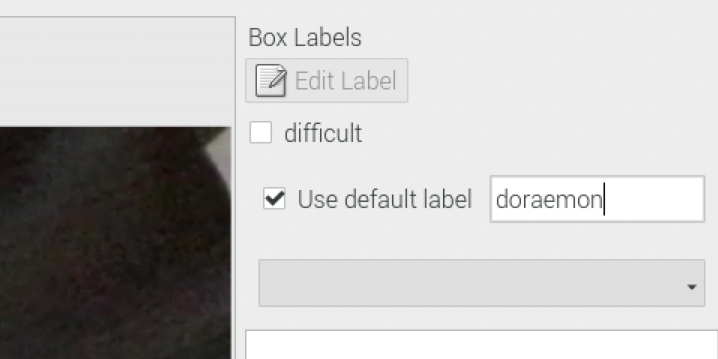
Press ‘Ctrl + s’ to save the annotation. Press ‘d’ on the keyboard or click Next Image on the left menu to open the next image. Repeat the previous steps until all images in the training folder are annotated. Do the same with the validation dataset and the testing dataset.
Conclusion
With libraries like TensorFlow and PyTorch, creating and training object detection models may not be the most difficult tasks. Obtaining the datasets is often the most difficult challenge. It can take a lot of time to create a nice dataset that is useful for training a good model. Be patient when you are working on your new dataset. In the next tutorial, we will use the datasets that we created to train a custom object detection model.