Introduction
In the previous tutorial, we use Jupyter notebook inside Visual Studio Code running on Raspberry Pi. Jupyter provides an interactive environment for writing Python programs. Not only is it suitable for novice coders, it is also an excellent way to play with the GPIOs of the Raspberry Pi.
In this tutorial, we will use the web interface of Jupyter and control the GPIOs with the controls from the ipywidgets package. Specifically, we will:
- Install Jupyter Lab,
ipywidgetsand other Python packages - Use the widgets provided by
ipywidgetsto interact with the Python program
As a demo, we will use a slider inside a Jupyter notebook to control a servo motor.
Materials and Tools
- Raspberry Pi x 1
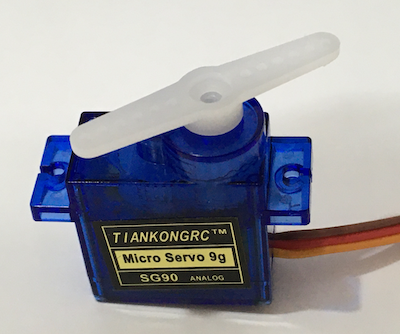
- SG90 servo motor x 1
- Jumper wires
Setting up Jupyter Lab, ipywidgets and other libraries
First, we should create a Python virtual environment for our project. This is especially important for using ipywidgets, as some versions of Jupyter Lab may not work well with some versions of ipywidgets.
Open the Terminal app and enter the following commands:
pi@raspberrypi:~$ sudo apt update
pi@raspberrypi:~$ sudo apt install python3-venv
pi@raspberrypi:~$ python3 -m venv nb
Then, we activate the newly created virtual environment nb.
pi@raspberrypi:~$ source nb/bin/activate
We have to update pip and install Jupyter Lab. We use version 1.2.6 of Jupyter Lab in this tutorial, but you may use other versions as well.
(nb) pi@raspberrypi:~$ pip install -U pip jupyterlab==1.2.6
Next, we need to install NodeJS in order to enable the Jupyter Widget extension later. Visit the Nodejs website and copy the link of the version of NodeJS for Raspberry Pi (ARM v7 for Raspberry Pi OS 32 bit). For instance, if the link is https://nodejs.org/dist/v14.15.4/node-v14.15.4-linux-armv7l.tar.xz, type the following commands to download, extract and install NodeJS:
(nb) pi@raspberrypi:~$ cd /tmp
(nb) pi@raspberrypi:~$ wget https://nodejs.org/dist/v14.15.4/node-v14.15.4-linux-armv7l.tar.xz
(nb) pi@raspberrypi:~$ tar -xvf node-v14.15.4-linux-armv7l.tar.xz
(nb) pi@raspberrypi:~$ cd node-v14.15.4-linux-armv7l
(nb) pi@raspberrypi:~$ sudo cp -R * /usr/local/
After the installation, you may type node -v in the terminal to check if NodeJS has been installed correctly. If yes, we can install the Jupyter Widget extension for Jupyter Lab.
(nb) pi@raspberrypi:~$ cd ~
(nb) pi@raspberrypi:~$ jupyter labextension install @jupyter-widgets/jupyterlab-manager@1.1
Note: If you use other versions of Jupyter Lab, you need to check this website and see which version of Jupyter Widget extension you should install.
At this point, the console may show some error messages indicating that Jupyter Lab cannot be built properly. We can fix this by launching Jupyter Lab first and rebuilding Jupyter Lab inside the web interface of Jupyter Lab.
(nb) pi@raspberrypi:~$ jupyter lab
The Chromium browser should open automatically. Jupyter Lab will ask you to build the Jupyter Lab again. Click ‘Build’ when you see this screen.
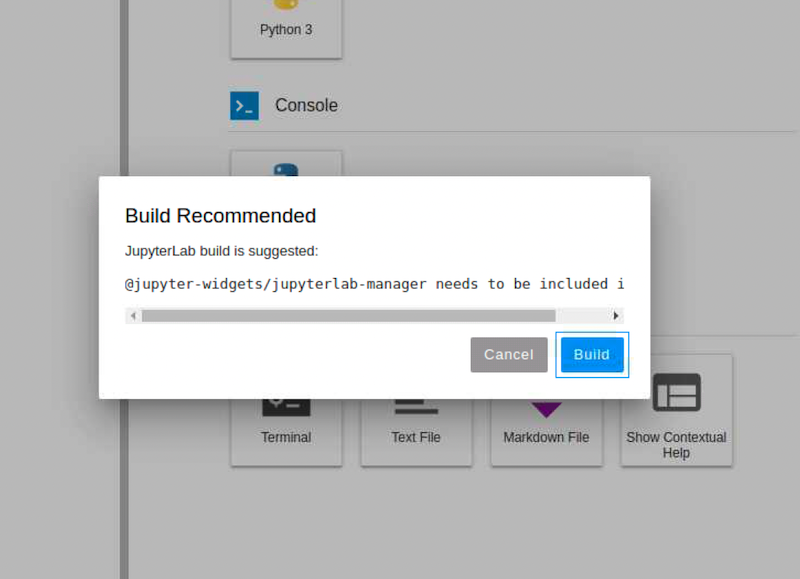
Wait for a while until Jupyter says Jupyter Lab has been rebuilt successfully. Click ‘Reload’ when the build is completed.

To stop the Jupyter server, press ‘Ctrl + C’ twice in the terminal.
After the Jupyter Lab is closed, we can install the ipywidgets package.
(nb) pi@raspberrypi:~$ pip install ipywidgets
Finally, we install other Python libraries that we need. For instance, we will need rpi.gpio to control the GPIOs.
(nb) pi@raspberrypi:~$ pip install rpi.gpio
The setup is completed. Whenever you want to use Jupyter Lab with those Python packages, simply activate this Python virtual environment and start the Jupyter server by using the command jupyter lab.
Connecting the Servo to the Raspberry Pi
The servo motor only has three cables: power (usually in red), ground (usually in brown) and signal (usually in orange). Connect the cables to the Raspberry Pi as follows.
| Servo motor | Raspberry Pi |
|---|---|
| Power | 5V |
| Ground | GND |
| Signal | Pin 11 |
Note: ‘11’ here is the pin number rather than the GPIO number (the GPIO number of pin 11 is 17). You can check the positions of the pins by entering the
pinoutcommand in the terminal.
Using ipywidgets
Start the Jupyter server once again. Let’s explore the Jupyter Lab interface a bit.
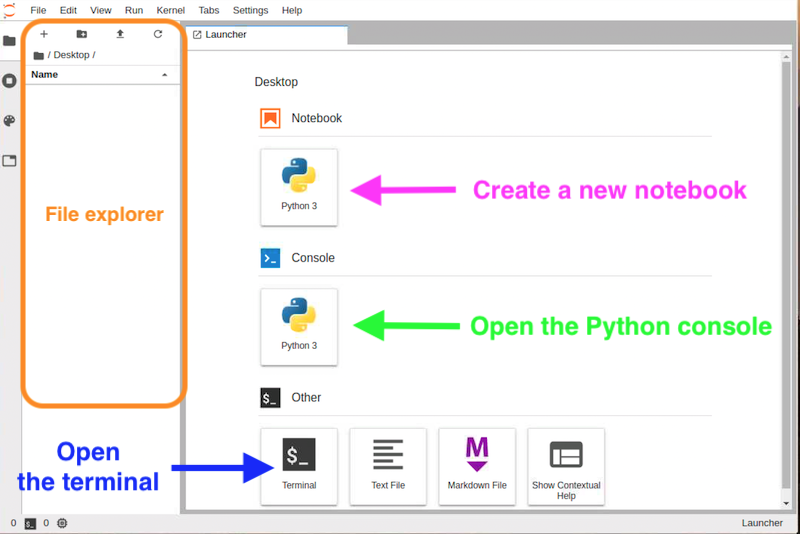
On the left hand side is the file explorer. We can navigate through folders and manage files inside the file explorer. On the right hand side is the launcher. We can use the launcher to create a new Jupyter notebook, open an interactive Python console or open a Linux terminal inside the Jupyter Lab.
Let’s click the ‘Python 3’ icon under ‘Notebook’ to create a new Jupyter notebook. After a blank notebook is created, you may rename it or move it to somewhere else with the file explorer.
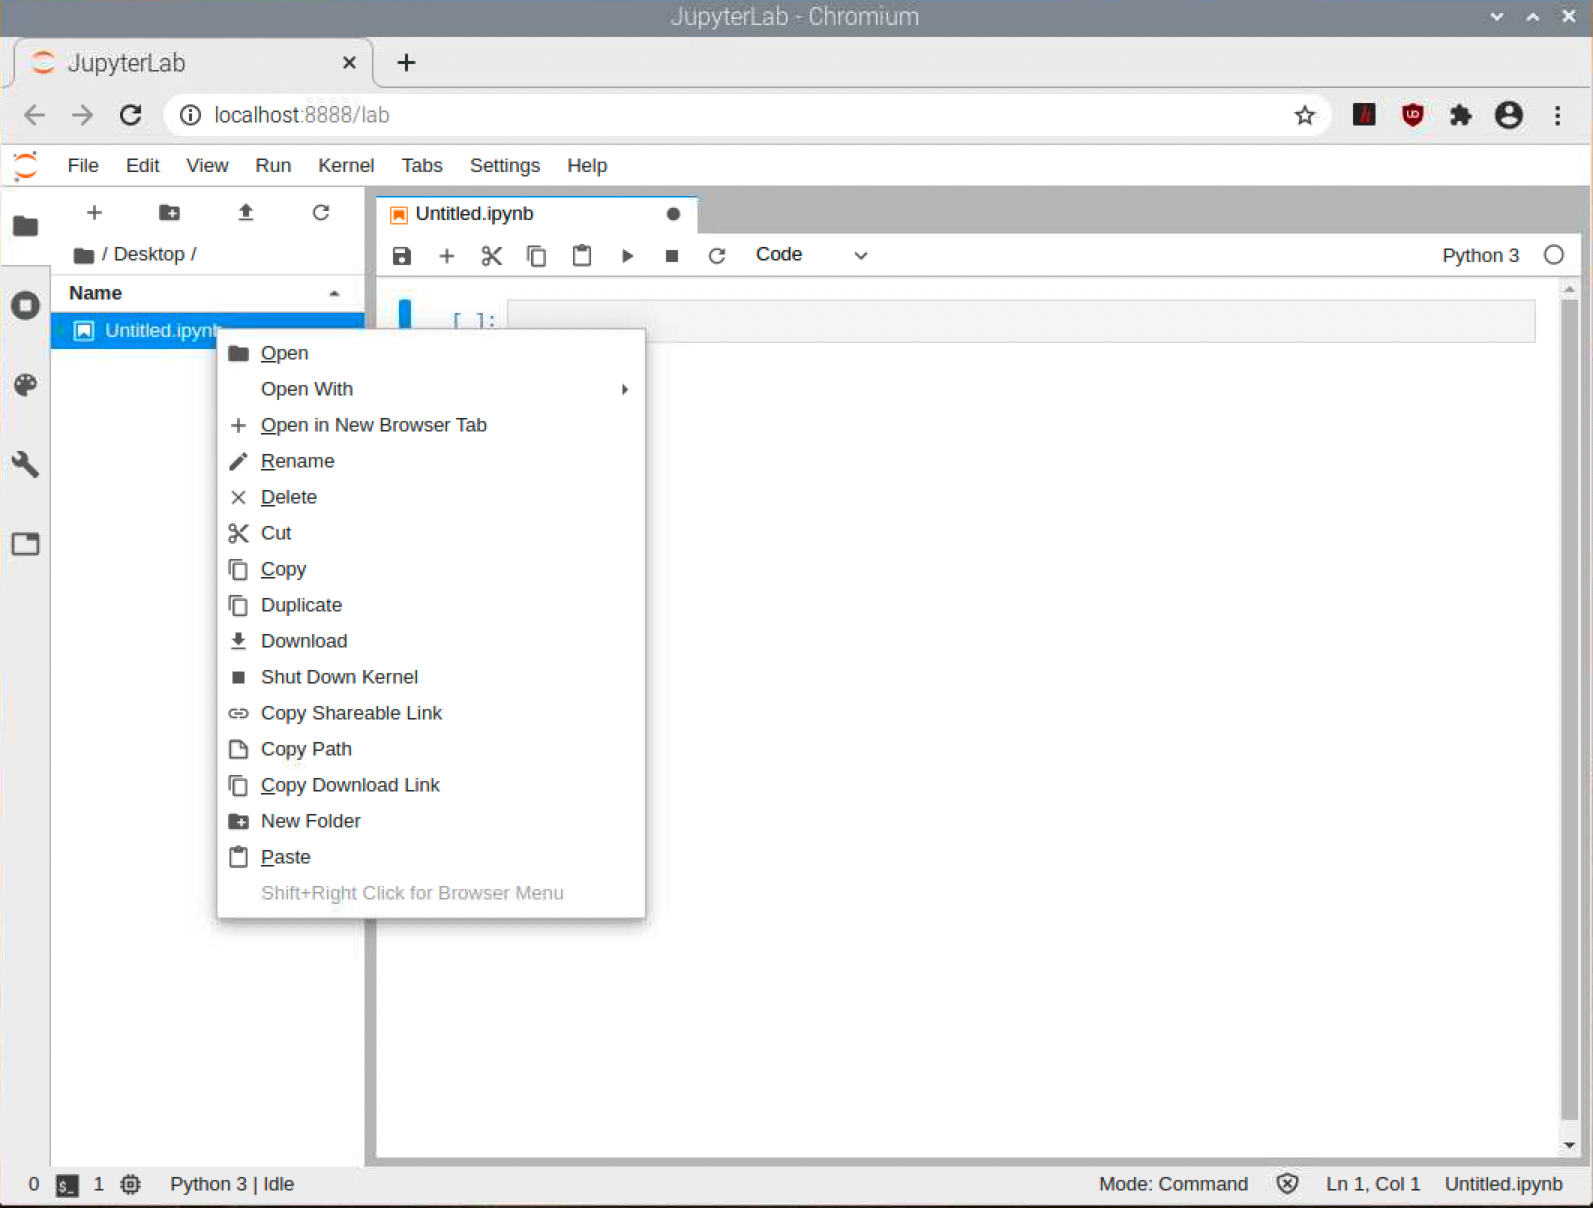
To start our project, let’s import some libraries first.
from ipywidgets import interact, IntSlider
import RPi.GPIO as GPIO
import time
Note: Recall that in a Jupyter notebook, we enter the codes in a cell and press ‘Shift + Enter’ to execute the codes in the cell.
Then, we set the GPIO mode.
GPIO.setmode(GPIO.BOARD)
Let’s say we are testing the following Python class for controlling a SG90 servo motor. Copy it to a cell and execute it.
class Servo():
    def __init__(self, pin, freq=50):
        self.pin = pin
        self.freq = freq
        self.started = False

    def start(self):
        GPIO.setup(self.pin, GPIO.OUT)
        self.output = GPIO.PWM(self.pin, self.freq)
        self.output.start(0)
        self.started = True
        print("Start sending signal to the servo.")

    def set_angle(self, angle):
        if not self.started:
            print('The servo has not started sending signal.')
            return
        if angle < 0 or angle > 180:
            raise ValueError('The angle must be between 0 and 180')
        self.output.ChangeDutyCycle(2+(angle/18))
        time.sleep(0.5)
        self.output.ChangeDutyCycle(0)

    def end(self):
        if self.started:
            self.started = False
            self.output.stop()
            GPIO.cleanup()
            print("Stop sending signal to the servo.")

    def __del__(self):
        self.end()
Next, we define a function to move the servo motor.
def move(servo, angle):
    servo.set_angle(angle)
    return angle
Then, we start the servo motor.
servo = Servo(11, 50) # use Pin 11 to generate 50 Hz PWM signal
servo.start()
After that, we can create a slider to control the servo motor using the interact function from the ipywidgets package.
interact(move, angle=IntSlider(min=0, max=180, step=1, value=90))
The move function will be called automatically whenever the slider is moved, and the angle parameters will be substituted with the value of the slider as well. We can set the minimum, the maximum, the step and the initial value for the slider.

Try moving the slider, and the servo should move with the slider as well!
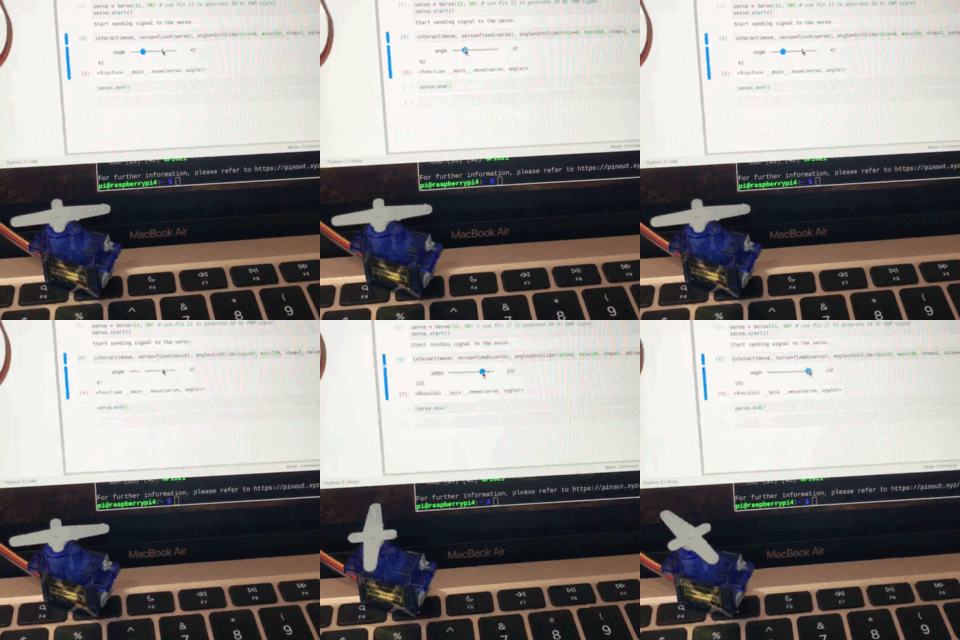
Finally, we stop the PWM signal by calling the end function of the object servo.
servo.end()
You can find the Jupyter notebook in this repository. If you have any problem, visit our Facebook page and feel free to ask us!
Conclusion
Jupyter is often used for projects related to data science. However, it’s also a great tool for novices to explore the world of physical computing. It’s also extremely convenient to share your codes and notes with others through Jupyter notebooks. Later, we will use Jupyter to play around with computer vision powered by machine learning, as well as to write MicroPython programs for microcontrollers. Stay tuned!