Introduction
In the previous tutorial, we have explored how to build a simple web server with the ESP32. However, you may have noticed the abnormality
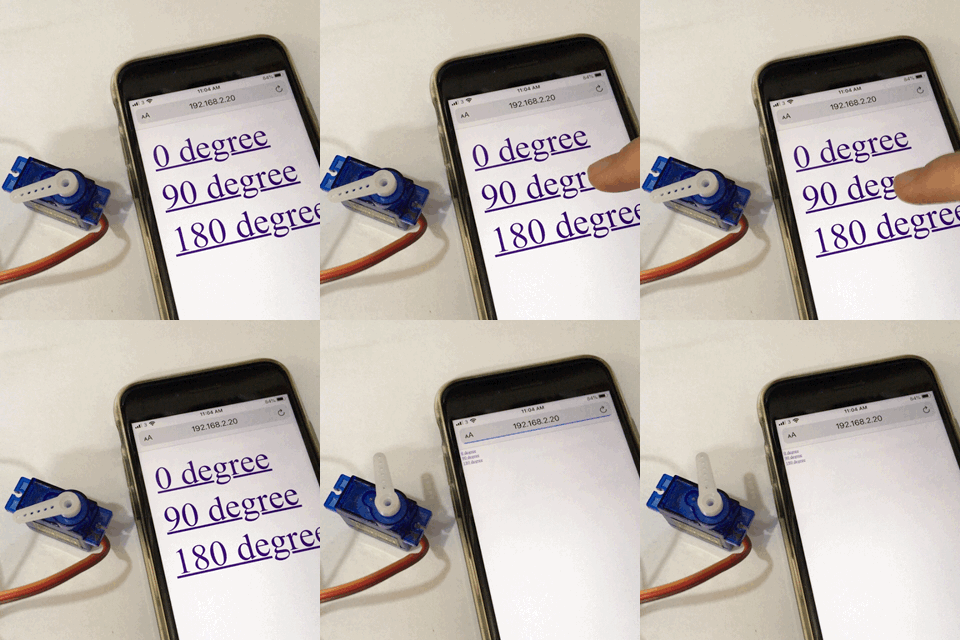
The webpage is not mobile friendly at all, since there’s no CSS for this page. However, it’s quite difficult to add CSS to the page, as the HTML code is directly written in the Arduino program.
server.on("/servo", HTTP_GET, [](AsyncWebServerRequest *request){
        String pageHTML = "<!DOCTYPE html><html><body><a href='servo?angle=0'>0 degree</a><br><a href='servo?angle=90'>90 degree</a><br><a href='servo?angle=180'>180 degree</a></body></html>";

    });
If we add the CSS to the HTML code, we will need to add a lot of escaping character to the string, and the program becomes very messy and prone to error. A better way to do it is to store the HTML code to a file, and load the file when needed. Luckily, it is quite easy to do it on ESP32 with SPIFSS.
In this tutorial, we will learn:
- how to store a file in the ESP32,
- how to load a file from the ESP32.
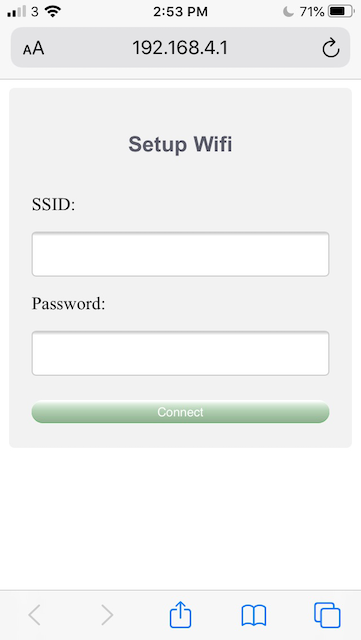
To achieve the above learning outcomes, we will make a webpage for connecting the ESP32 to a router with Internet connection.
Prerequisites
Before the tutorial, make sure you have had some experiencing of building a simple web server with ESP32 and Arduino IDE. If not, you should go through this tutorial first.
Install the ESP32 File Uploader for Arduino
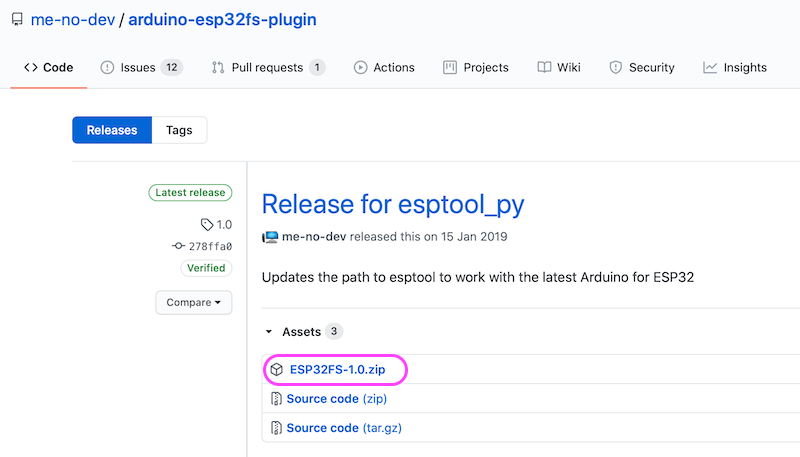
To upload files to ESP32, we need to install the ESP32 File Uploader plugin for the Arduino IDE. First, visit this Github page and download the latest release of the plugin.
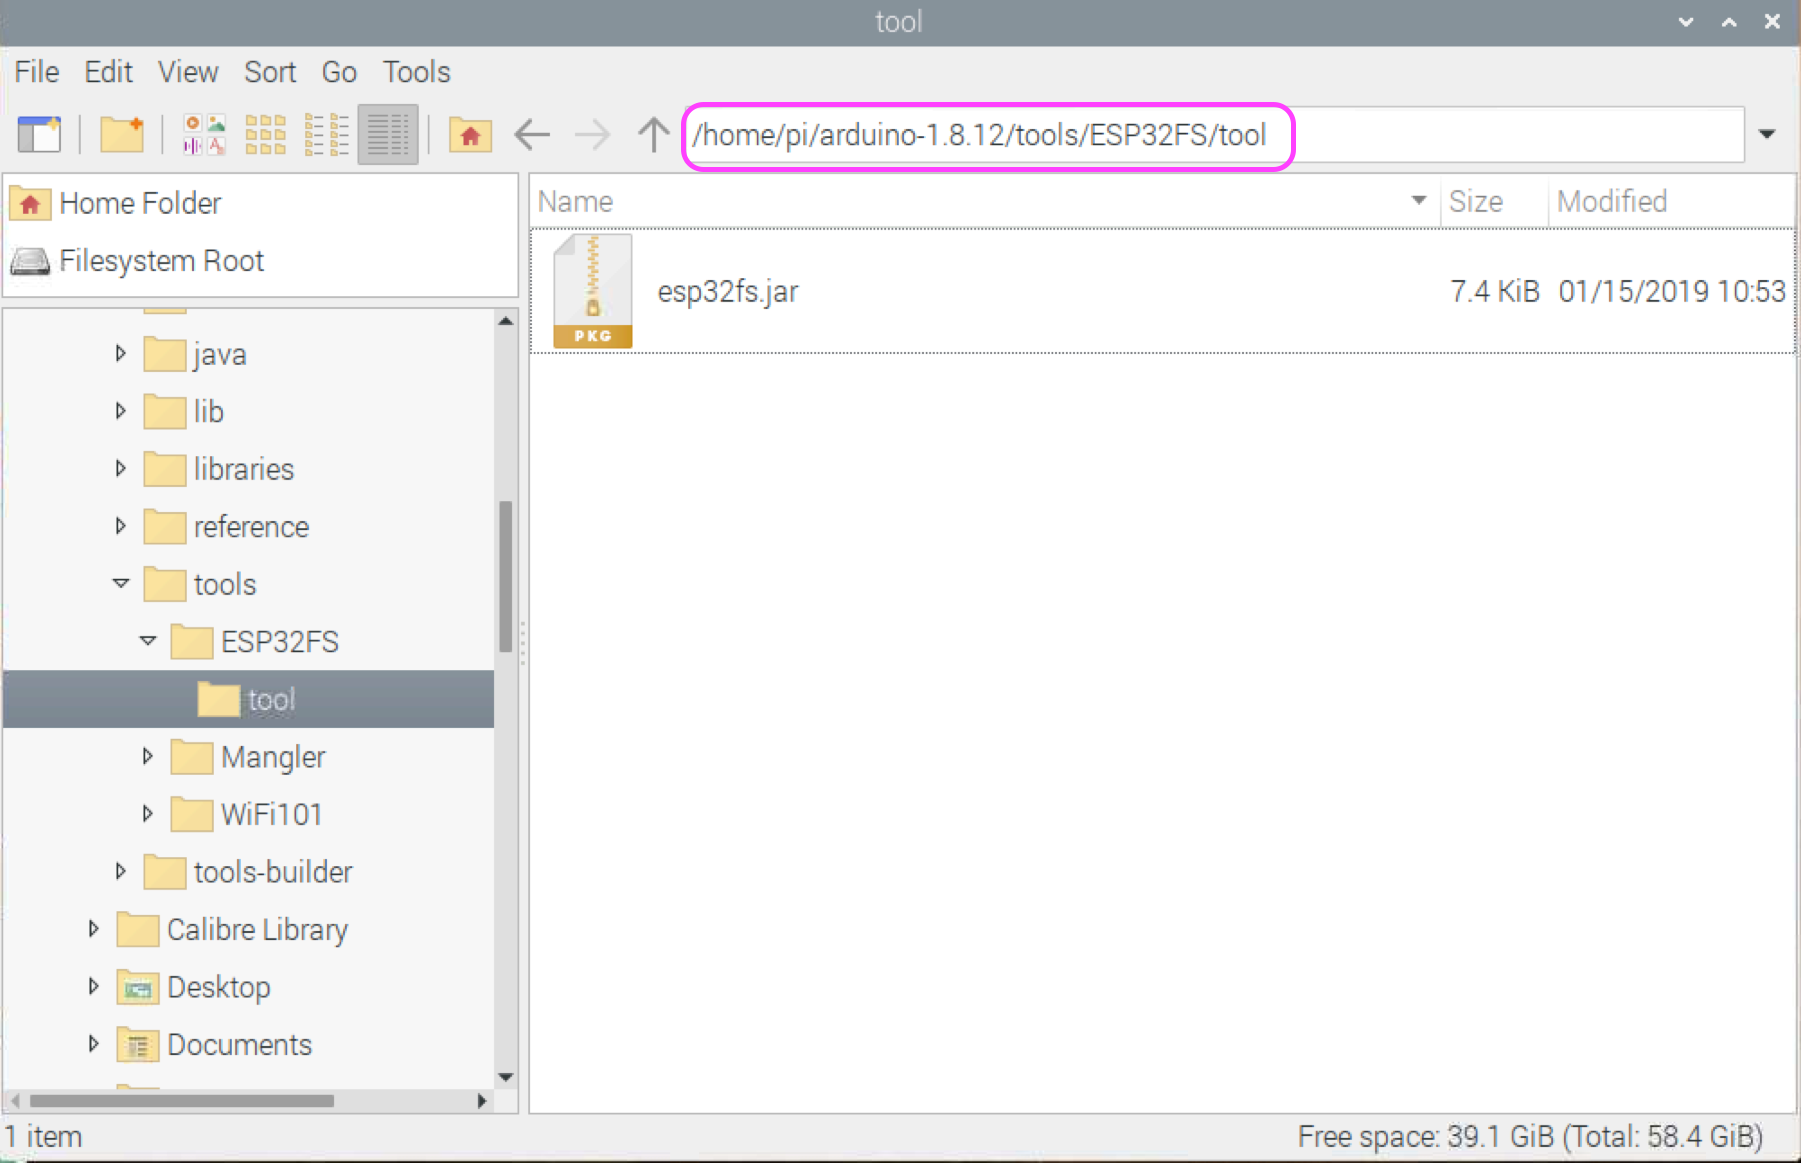
After unzipping the file, we can see a .jar file in the folder ESP32FS/tool.
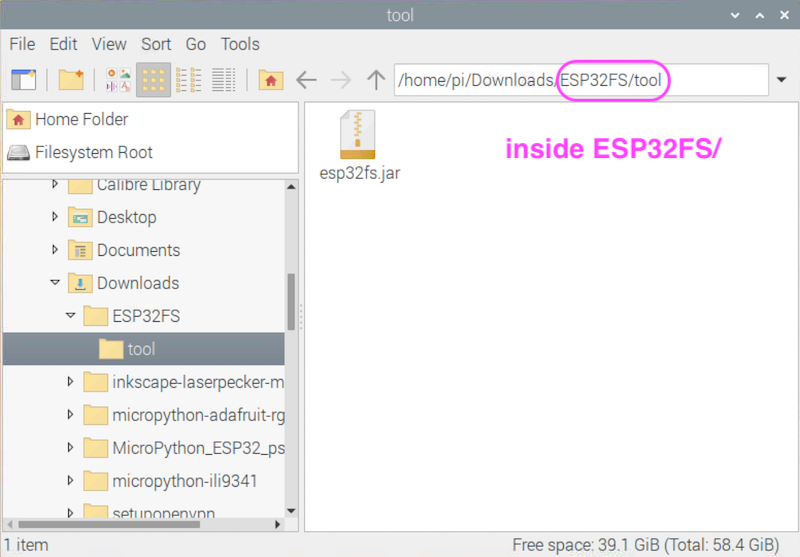
Then, we copy the ESP32FS folder to the plugin folder of the Arduino IDE. Suppose the Arduino IDE is installed at /home/pi/arduino-1.8.12, we should copy the ESP32FS folder to /home/pi/arduino-1.8.12/tools. i.e. the jar file should be in /home/pi/arduino-1.8.12/tool/ESP32FS/tool.
NOTE: If you use a Mac, the
toolsfolder of the Arduino IDE is likely inside theDocumentsfolder.
Then, when we open the Arduino IDE (if you have opened it, re-open it), we can see ESP32 Sketch Data Upload in the Tools menu. The installation is completed!.
Upload the HTML files
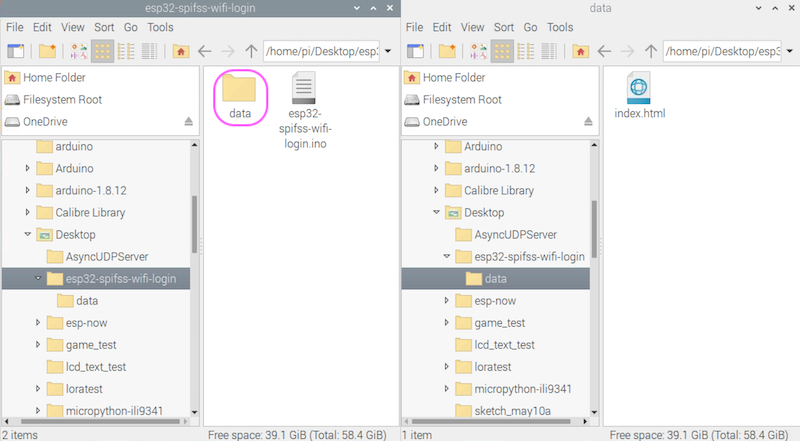
Start and save a new Arduino project. In the Arduino project folder, create a folder called data. Download this HTML file from Github and put it into the data folder.
Then, click Tools → ESP32 Sketch Data Upload to upload the file to the SPIFSS of ESP32.
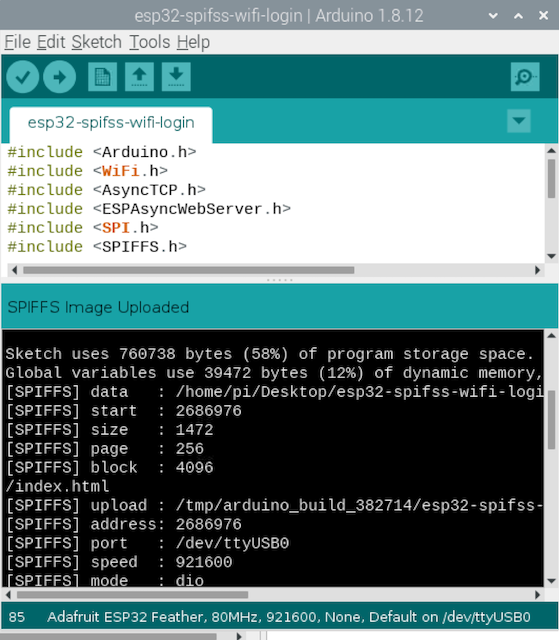
NOTE: For some ESP32, you may need to press the enable pin to start the upload process.
The Arduino Sketch
The Wifi module of ESP32 has three modes: the station (STA) mode, the access point (AP) mode and the hybrid (STA + AP) mode. In STA mode, the ESP32 can connect to a normal Wifi router with Internet connection like other devices. In AP mode, the ESP32 acts as a Wifi access point (the same as a Wifi router, but without Internet connection) and other devices can connect to it. In STA + AP mode, the ESP32 can acts as a Wifi access point and connect to a normal Wifi router with Internet connection at the same time.
Thus, we can use the STA + AP mode to connect the ESP32 to the Internet without hardcoding the Wifi credential in the Arduino program. First, we create an Wifi access point (without Internet connection) with the ESP32 so that another device (e.g. a smartphone) can connect to it. Then, the ESP32 starts a web server so that any devices connecting to this ESP32 access point can browse the webpage for inputting the credentials of a Wifi router with Internet connection. Finally, the ESP32 connects to the Internet via the real Wifi station.
To start the sketch, let’s import some libraries that we need to use:
#include <Arduino.h>
#include <WiFi.h>
#include <AsyncTCP.h>
#include <ESPAsyncWebServer.h>
#include <SPI.h>
#include <SPIFFS.h>
The setup Function
In the setup function, we first start the serial communication:
void setup() {
    // Begin the serial communication as usual
    Serial.begin(115200);
}
To access the files in SPIFSS, we need to mount the file system by calling the SPIFSS.begin funcion:
void setup() {
    /* Code for beginning serial communication ... */

    // Mount the SPIFSS file system
    if(!SPIFFS.begin()){
        Serial.println("An Error has occurred while mounting SPIFFS");
    }
}
Finally, we call two functions for starting the ESP32 access point and the web server, which we will write in the later steps.
void setup() {
    /* Code for beginning serial communication and mounting SPIFSS ... */

    // The following functions will be written next:
    start_access_point();
    start_web_server();
}
Configure the ESP32 Access Point
Just like a normal Wifi access point, the ESP32 access point needs an SSID and a password. You may take whatever SSID and password you like:
const char* ap_ssid = "ESP32";
const char* ap_pwd = "12345678";
Then, we write the function start_access_poiont to configure the access point:
void start_access_point(){
    WiFi.softAP(ap_ssid, ap_pwd);
    IPAddress myIP = WiFi.softAPIP();
    Serial.println("Access point started");
    Serial.print("AP IP address: ");
    Serial.println(myIP);
}
In fact, to start the access point, all we need to do is to call the Wifi.softAP function with the SSID and the password of the access point. The rest of this function just shows the IP address of the access point, which we will need to browse the Wifi login webpage later.
NOTE: The IP address of the ESP32 in its own access point network is usually
192.168.4.1.
Configure the Web server
Just like in the previous tutorial, we create an AsyncWebServer object to handle the HTTP request. Also, to tidy up the codes, we create two constants for the names of the parameters in the HTTP POST request with the Wifi credentials.
AsyncWebServer server(80);
const char* PARAM_SSID = "ssid";
const char* PARAM_PWD = "pwd";
Then, we write the function start_web_server to configure the handlers of the web server. First, we set the handler for the index page /. Instead of putting a string with the HTML contents, we load the HTML file from the SPIFSS:
void start_web_server(){
    // Handler for the index page
    server.on("/", HTTP_GET, [](AsyncWebServerRequest *request){
      request->send(SPIFFS, "/index.html", "text/html");
  });
}
Next, we create a handler for handling the HTML form data submitted by users, which contains the login credential of the Wifi router with Internet connection:
void start_web_server(){
    /* The handler for the index page ... */

    // For handling the data submitted by the user
    server.on("/post", HTTP_POST, [] (AsyncWebServerRequest *request) {
      String message = "";
      String ssid = "";
      String pwd = "";

      if (request->hasParam(PARAM_SSID, true) && request->hasParam(PARAM_PWD, true)) {
          ssid =  request->getParam(PARAM_SSID, true)->value();
          pwd = request->getParam(PARAM_PWD, true)->value();
          message = "Connecting to Wifi station";
      } else {
          message = "No SSID or Password!";
      }

      Serial.println(message);
      request->send(200, "text/plain", message);

      if (ssid != "" && pwd !=""){
        connectToWifi(ssid, pwd);
      }
  });
}
Let’s take a deeper look of this handler. First, we initalize a few string objects to store the debug message and the data in the HTTP request:
    String message = "";
    String ssid = "";
    String pwd = "";
Then, we check if the HTTP request contains the parameters we need. If true, we extract the data and store them:
    if (request->hasParam(PARAM_SSID, true) && request->hasParam(PARAM_PWD, true)) {
        ssid =  request->getParam(PARAM_SSID, true)->value();
        pwd = request->getParam(PARAM_PWD, true)->value();
        message = "Connecting to Wifi station";
    } else {
        message = "No SSID or Password!";
    }
Next, we print the debug message to the console, as well as send it as an HTTP response:
    Serial.println(message);
    request->send(200, "text/plain", message);
If the SSID and the password can be extracted, call the to-be-written function connectToWifi to conenct the ESP32 to the Wifi router with Internet connection:
    if (ssid != "" && pwd !=""){
        connectToWifi(ssid, pwd);
    }
We add another handler for routes that cannot be found, and start the web server by calling the begin function of the server object.
void start_web_server(){
    /* The handler for the index page and parsing the Wifi credentials ... */

    // The handler for handling non-existing routes:
    server.onNotFound([] (AsyncWebServerRequest *request){
        request->send(404, "text/plain", "Not found");
    });

    // Start the web server
    server.begin();
}
Connect to the Wifi Router with Internet Connection
The connectToWifi function connects the ESP32 to the Wifi router by calling Wifi.begin as usual:
void connectToWifi(String _ssid, String _password){

    WiFi.begin(_ssid.c_str(), _password.c_str());

    if (WiFi.waitForConnectResult() != WL_CONNECTED) {
        Serial.printf("WiFi Failed!\n");
    } else{
        Serial.println("");
        Serial.println("WiFi router connected");
        Serial.println("IP address: ");
        Serial.println(WiFi.localIP());
    }

}
NOTE: The
Wifi.beginfunction takes C strings rather than Arduino’sStringobjects as its parameters. Thus, we need to call thec_str()function to do the conversion first.
Upload and Test
The program is completed! Upload the sketch to the ESP32 board. Then, use a smartphone or other devices with Wifi connectivity to search for the SSID of the ESP32 access point:
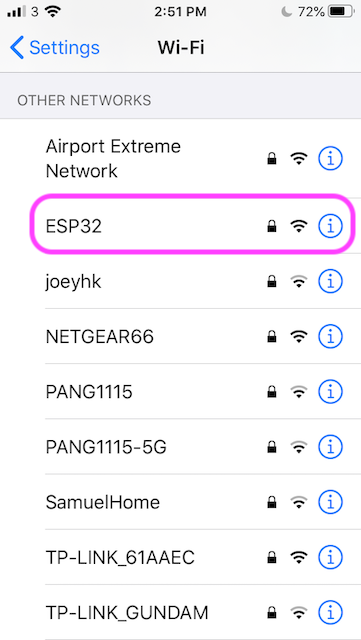
Enter the password you have set in the Arduino sketch. Then, open a browser and enter the IP address of the ESP32 192.168.4.1. Enter the credentials of the Wifi router with Internet connection.
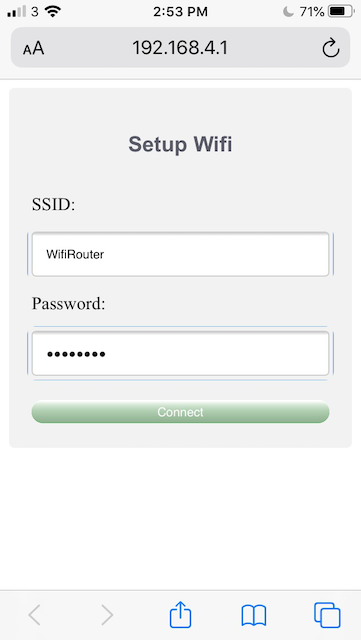
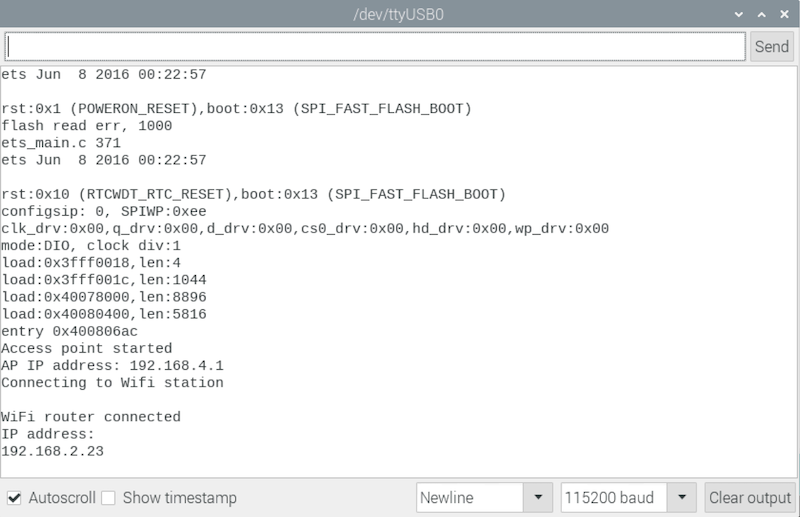
After clicking the ‘Connect’ button, the ESP32 can be connected to the Internet!
If you have any problems, check out the sample code and ask us on our Facebook page.
Conclusion
The SPIFSS enables us to get access to the ESP32 storage space, and we can store and retrieve data by calling a few simple functions. Other than loading pre-uploaded files from the file system, it’s also possible to write data to a file in an Arduino program. We may record data from different sensors connected to the ESP32, and retrieve the data later. In the future, we will look at how to use ESP32 as a datalogger.