Introduction
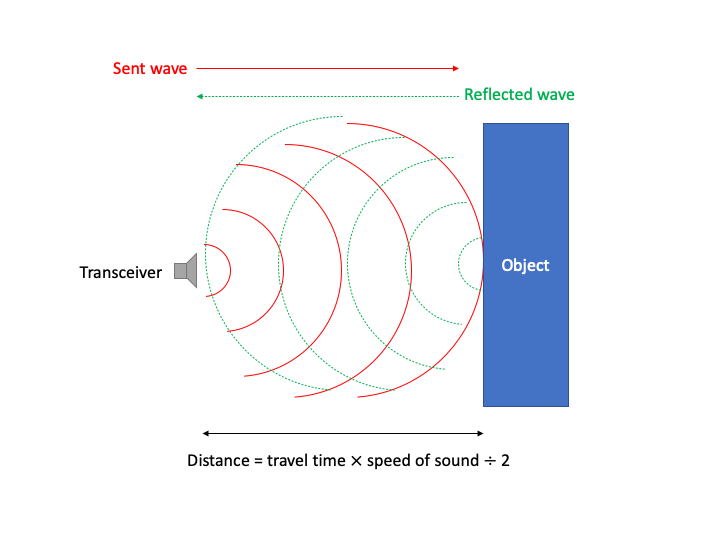
Sound navigation and ranging, also known as Sonar, uses sound wave to detect objects. The working principle of active sonar is quite simple. A sonar transceiver sends a pulse of sound wave. If the sound wave hits an object, the sound wave is reflected back to the transceiver. By measuring the time required for the pulse to travel to the object and travel back to the transceiver, we can calculate the distance between the object and the transceiver with the speed of sound.
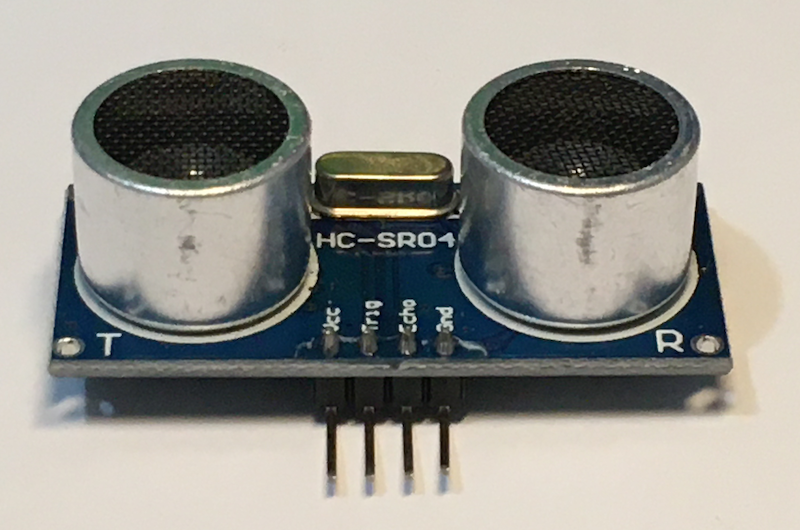
HC-SR04 is an inexpensive ultrasonic sensor. It can measure distance from 2 cm to about 500 cm. Therefore, HC-SR04 is ideal for adding collision avoidance capability to a robot.
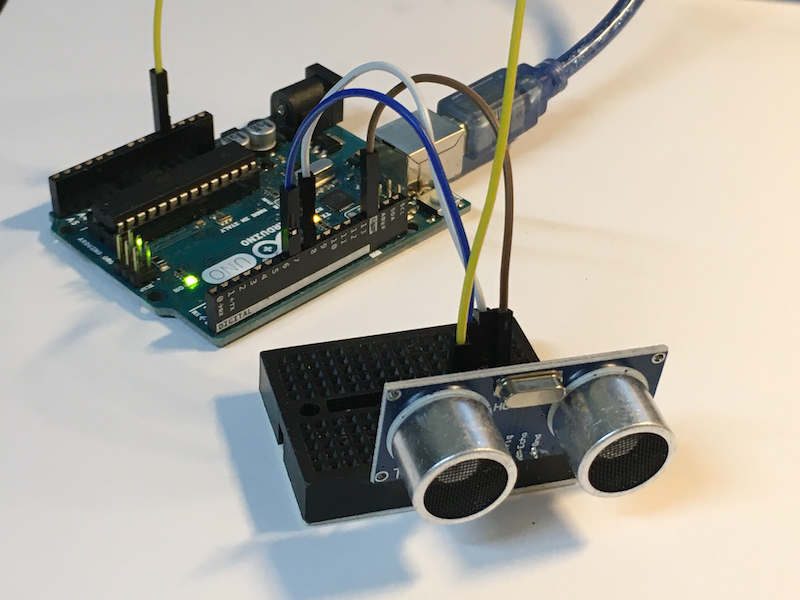
In this tutorial, we will connect the HC-SR04 to an Arduino, and use this setup to measure the distance between the sensor and a nearby obstacle.
Materials and Tools
- Arduino Uno x 1
- HC-SR04 Ultrasonic Sensor x 1
- LED lights of different colors x 3 (for assignment only)
- 10 ohm resistors x 3 (for assignment only)
- Jumper wires
HC-SR04 Sensor
The HC-SR04 is an ultrasound transceiver, which means it emits sound wave and detects the reflected wave.
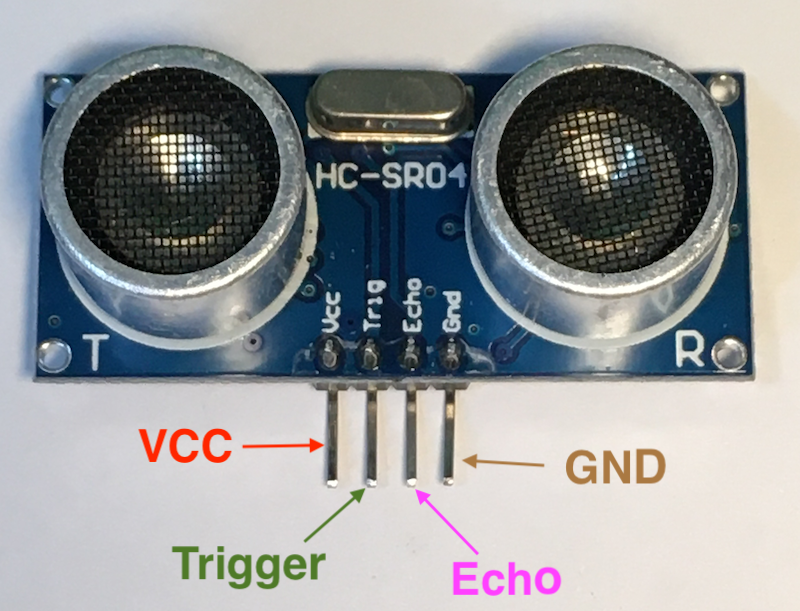
The HC-SR04 has four pins. VCC and GND are the power pins. The ‘trigger’ pin is for starting the measurement, and the ‘echo’ pin is for outputting the measured result.
To start the measurement, we need to make the sensor emit some sound wave. When a microcontroller like Arduino sets the ‘trigger’ pin to the HIGH state for 10 microseconds, the sensor emits a few pulses of sound wave. Then, the sensor sets the ‘echo’ pin to HIGH until the reflected signal arrives. i.e. We can find out how much time the pulses of sound wave take to travel forward and backward by measuring how long the ‘echo’ pin is at the HIGH state.
Connect the Sensor to the Arduino
The connection is rather straightforward. Other than the power pins, we can connect the trigger pin and the echo pin of the HC-SR04 to any digital I/O pins of the Arduino.
| HC-SR04 | Arduino |
|---|---|
| VCC | 5V |
| GND | GND |
| Trigger | 7 |
| Echo | 8 |
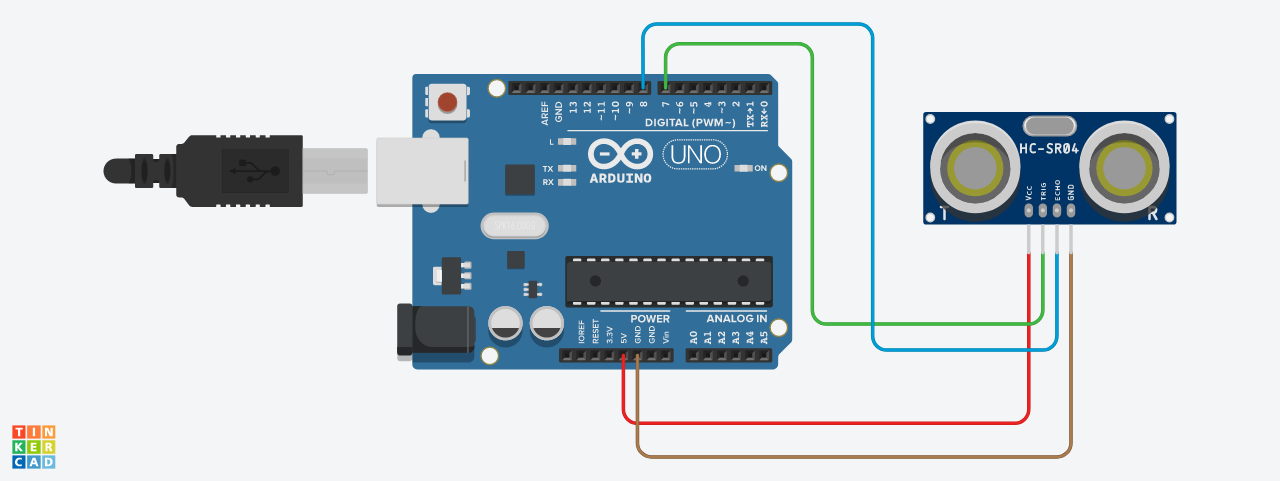
NOTE: Technically, we can use the same pin for both the trigger pin and the echo pin, as the input mode and the output mode are used at different times.
Measure Distance with the Sensor
Let’s write an Arduino program to read the distance measured by the sensor. Surprisingly, we don’t need to use any extra library to make this work. Using the built-in functions of Arduino to read the signals from the HC-SR04 is actually really easy.
First, we define two integer constants for the pins, as well as two long integer variables for storing the data from the sensor.
const int trigger_pin = 7;
const int echo_pin = 8;
long travel_time, distance;
Then, we start the serial monitor, and set the pins to appropriate modes in the setup function.
void setup(){
    Serial.begin(9600);
    pinMode(trigger_pin, OUTPUT);
    pinMode(echo_pin, INPUT);
}
Then, we make measurements repeatedly in the loop function. As mentioned, we need to set the ‘trigger’ pin to HIGH for 10 microseconds so that the sensor can emit a few pulses of sound wave. However, in order to produce a clean HIGH signal, we need to set the ‘trigger’ pin to LOW for 5 microseonds before setting the ‘trigger’ pin to HIGH for 10 microseconds.
void loop(){
    digitalWrite(trigger_pin, LOW);
    delayMicroseconds(5);
    digitalWrite(trigger_pin, HIGH);
    delayMicroseconds(10);
    digitalWrite(trigger_pin, LOW);
}
Next, we measure how long the ‘echo’ pin is set to HIGH by using the Arduino’s pulseIn function, and store the measured time to the variable travel_time. The measured time is in microseconds.
void loop(){
    /* codes for sound wave emission*/
    /* ...  */
    travel_time = pulseIn(echo_pin, HIGH);
}
Then, we need to calculate the distance by using the speed of sound. At 20 degree Celsius, the speed of sound is 343 m/s. Since 1 m is 100 cm, and 1 s is 1,000,000 microseconds, we can calculate the required distance (in cm) as follows:

NOTE: The 1/2 factor is necessary as the time measured by the
pulseInfunction is the time for the sound wave to travel forward and backward.
We can use this formula to calculate the required distance.
void loop(){
    /* codes for sound wave emission and time measurement*/
    /* ...  */
    distance = 0.01715 * travel_time;
}
Finally, we print out the final result:
void loop(){
    /* codes for sound wave emission, time measurement and distance calculation*/
    /* ...  */
    Serial.print("Distance: ");
    Serial.print(distance);
    Serial.print(" cm");
    Serial.println();

    delay(50);
}
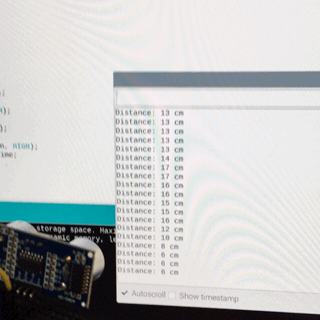
Upload the program to the Arduino, and you should be able to see the distances in the Serial Monitor.
If you have any problems, you can check out the sample code, or ask us on our Facebook page.
Conclusion and Assignment
Since an Arduino can control motors and measure distance with the HC-SR04, we can use the data from the HC-SR04 to control a robot. For instance, when the distance measured by the sensor is less than 2 cm, we can turn off the motors. Therefore, ultrasonic ranging with HC-SR04 can be an inexpensive and simple solution for collision avoidance system of robots.
To test this idea, you may complete the following assignment:
When the sensor is 10 cm from an obstacle, only a yellow LED is turned on; when the sensor is 5 cm from an obstacle, only a red LED is turned on; otherwise, only a green LED is turned on.
After completing the assignment, you can check out the sample code, or ask questions on our Facebook page.